Become a Patron!

The Official Staple Coil Thread

mach1ne

Gold Contributor
Member For 4 Years
so in the 'post your builds' thread, there is a ton of good information, questions and answers on everything from basic, to highly advanced builds and techniques. its quickly grown into an amazing resource, but its also quickly grown too large to find that info in. most of us have answered the same questions over and over again.

the idea for these 'the official x thread', is to get the information on 'x' (build/technique) all in one place so its easier to find, and consolidate the questions/answers/discussion a little bit, and leave that other thread for pics, chat and encouragement. links to all the 'official' threads are collected here, have a look through the rest for tips on everything from planning a build in steam-engine, beginner to advanced builds, and even coil photography. feel free to share tips, ask questions and discuss staple coils and all their variants in here...

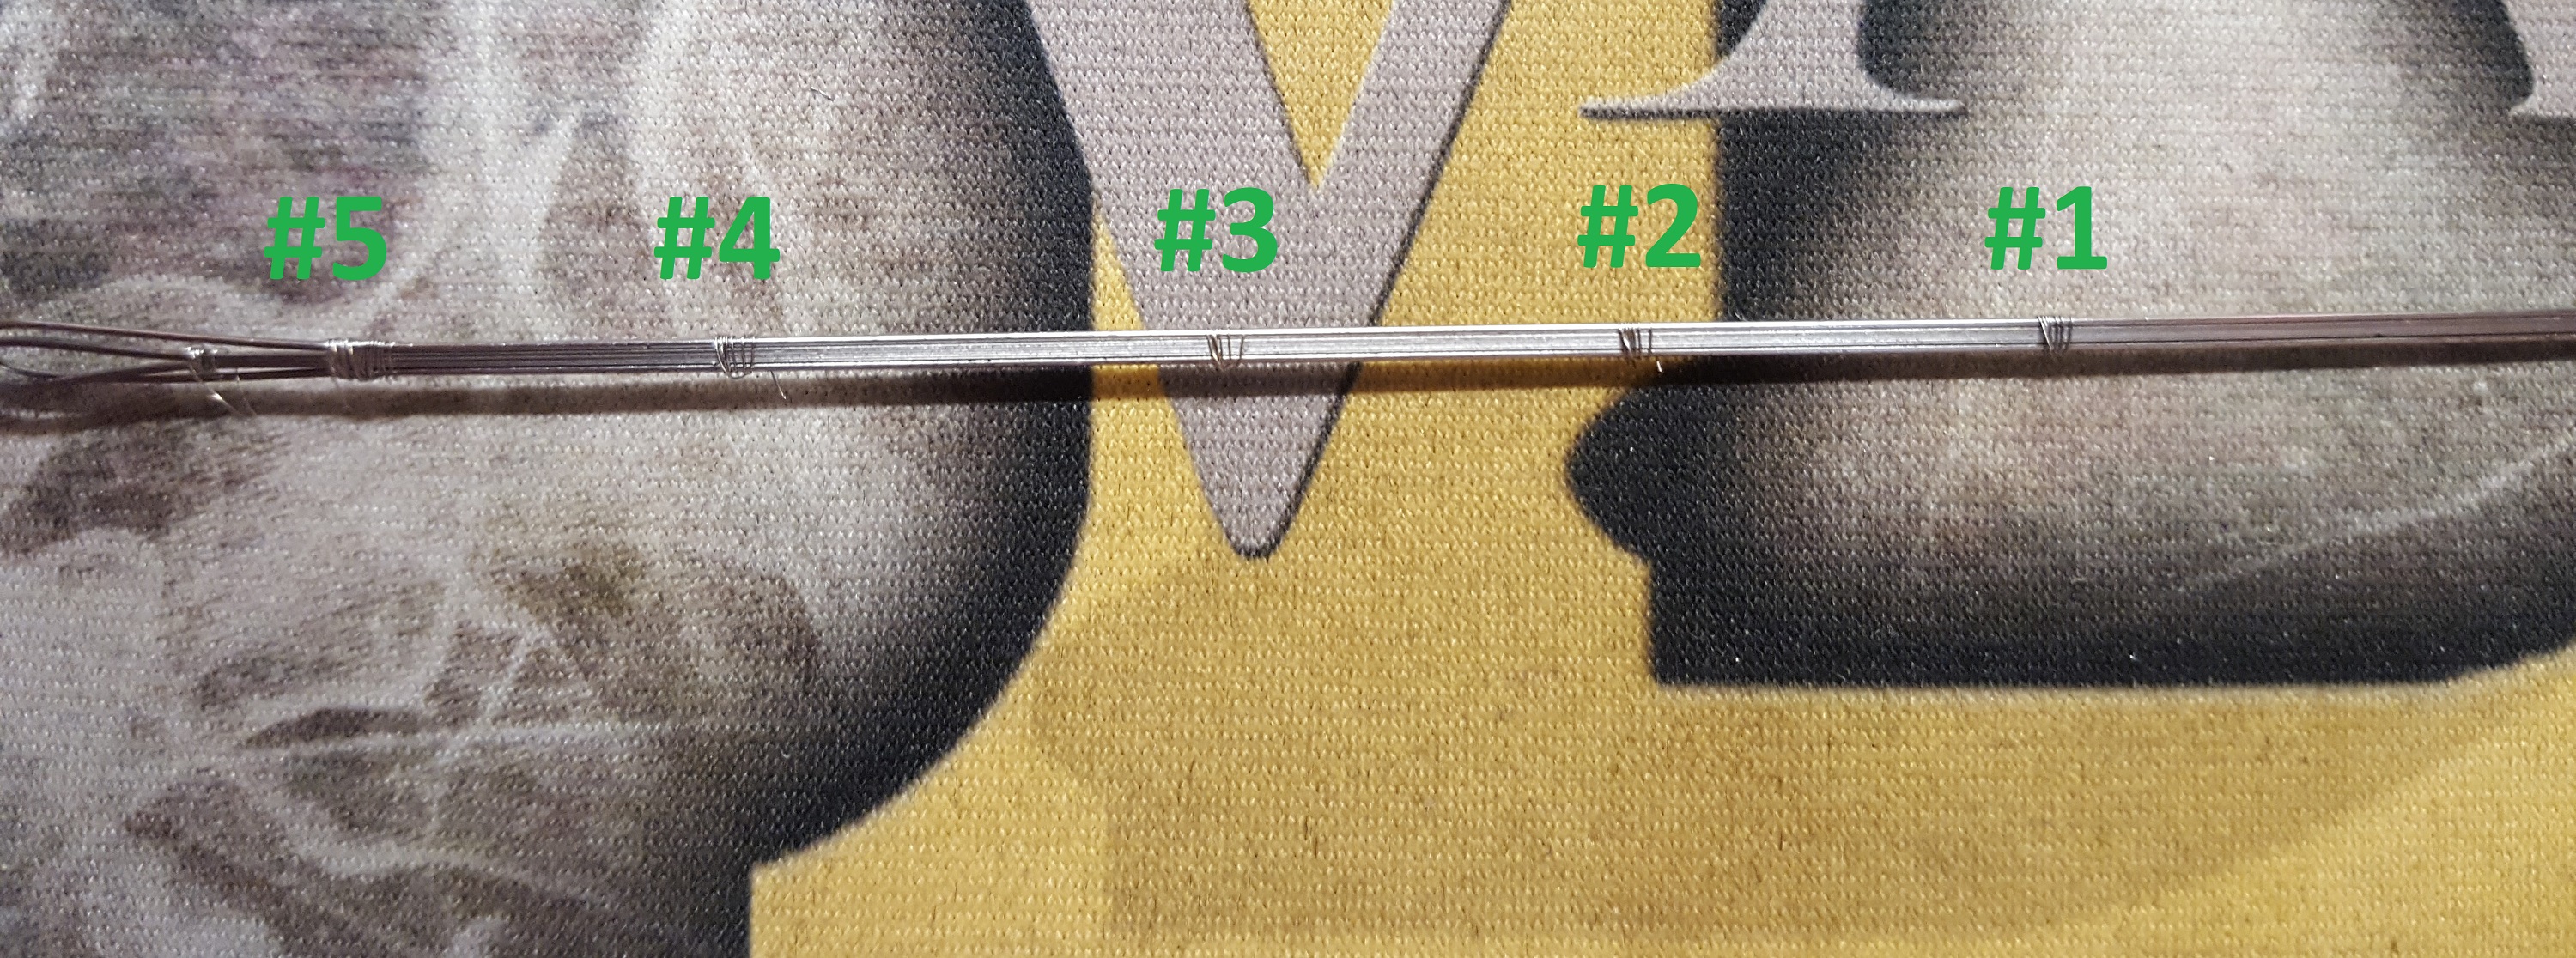
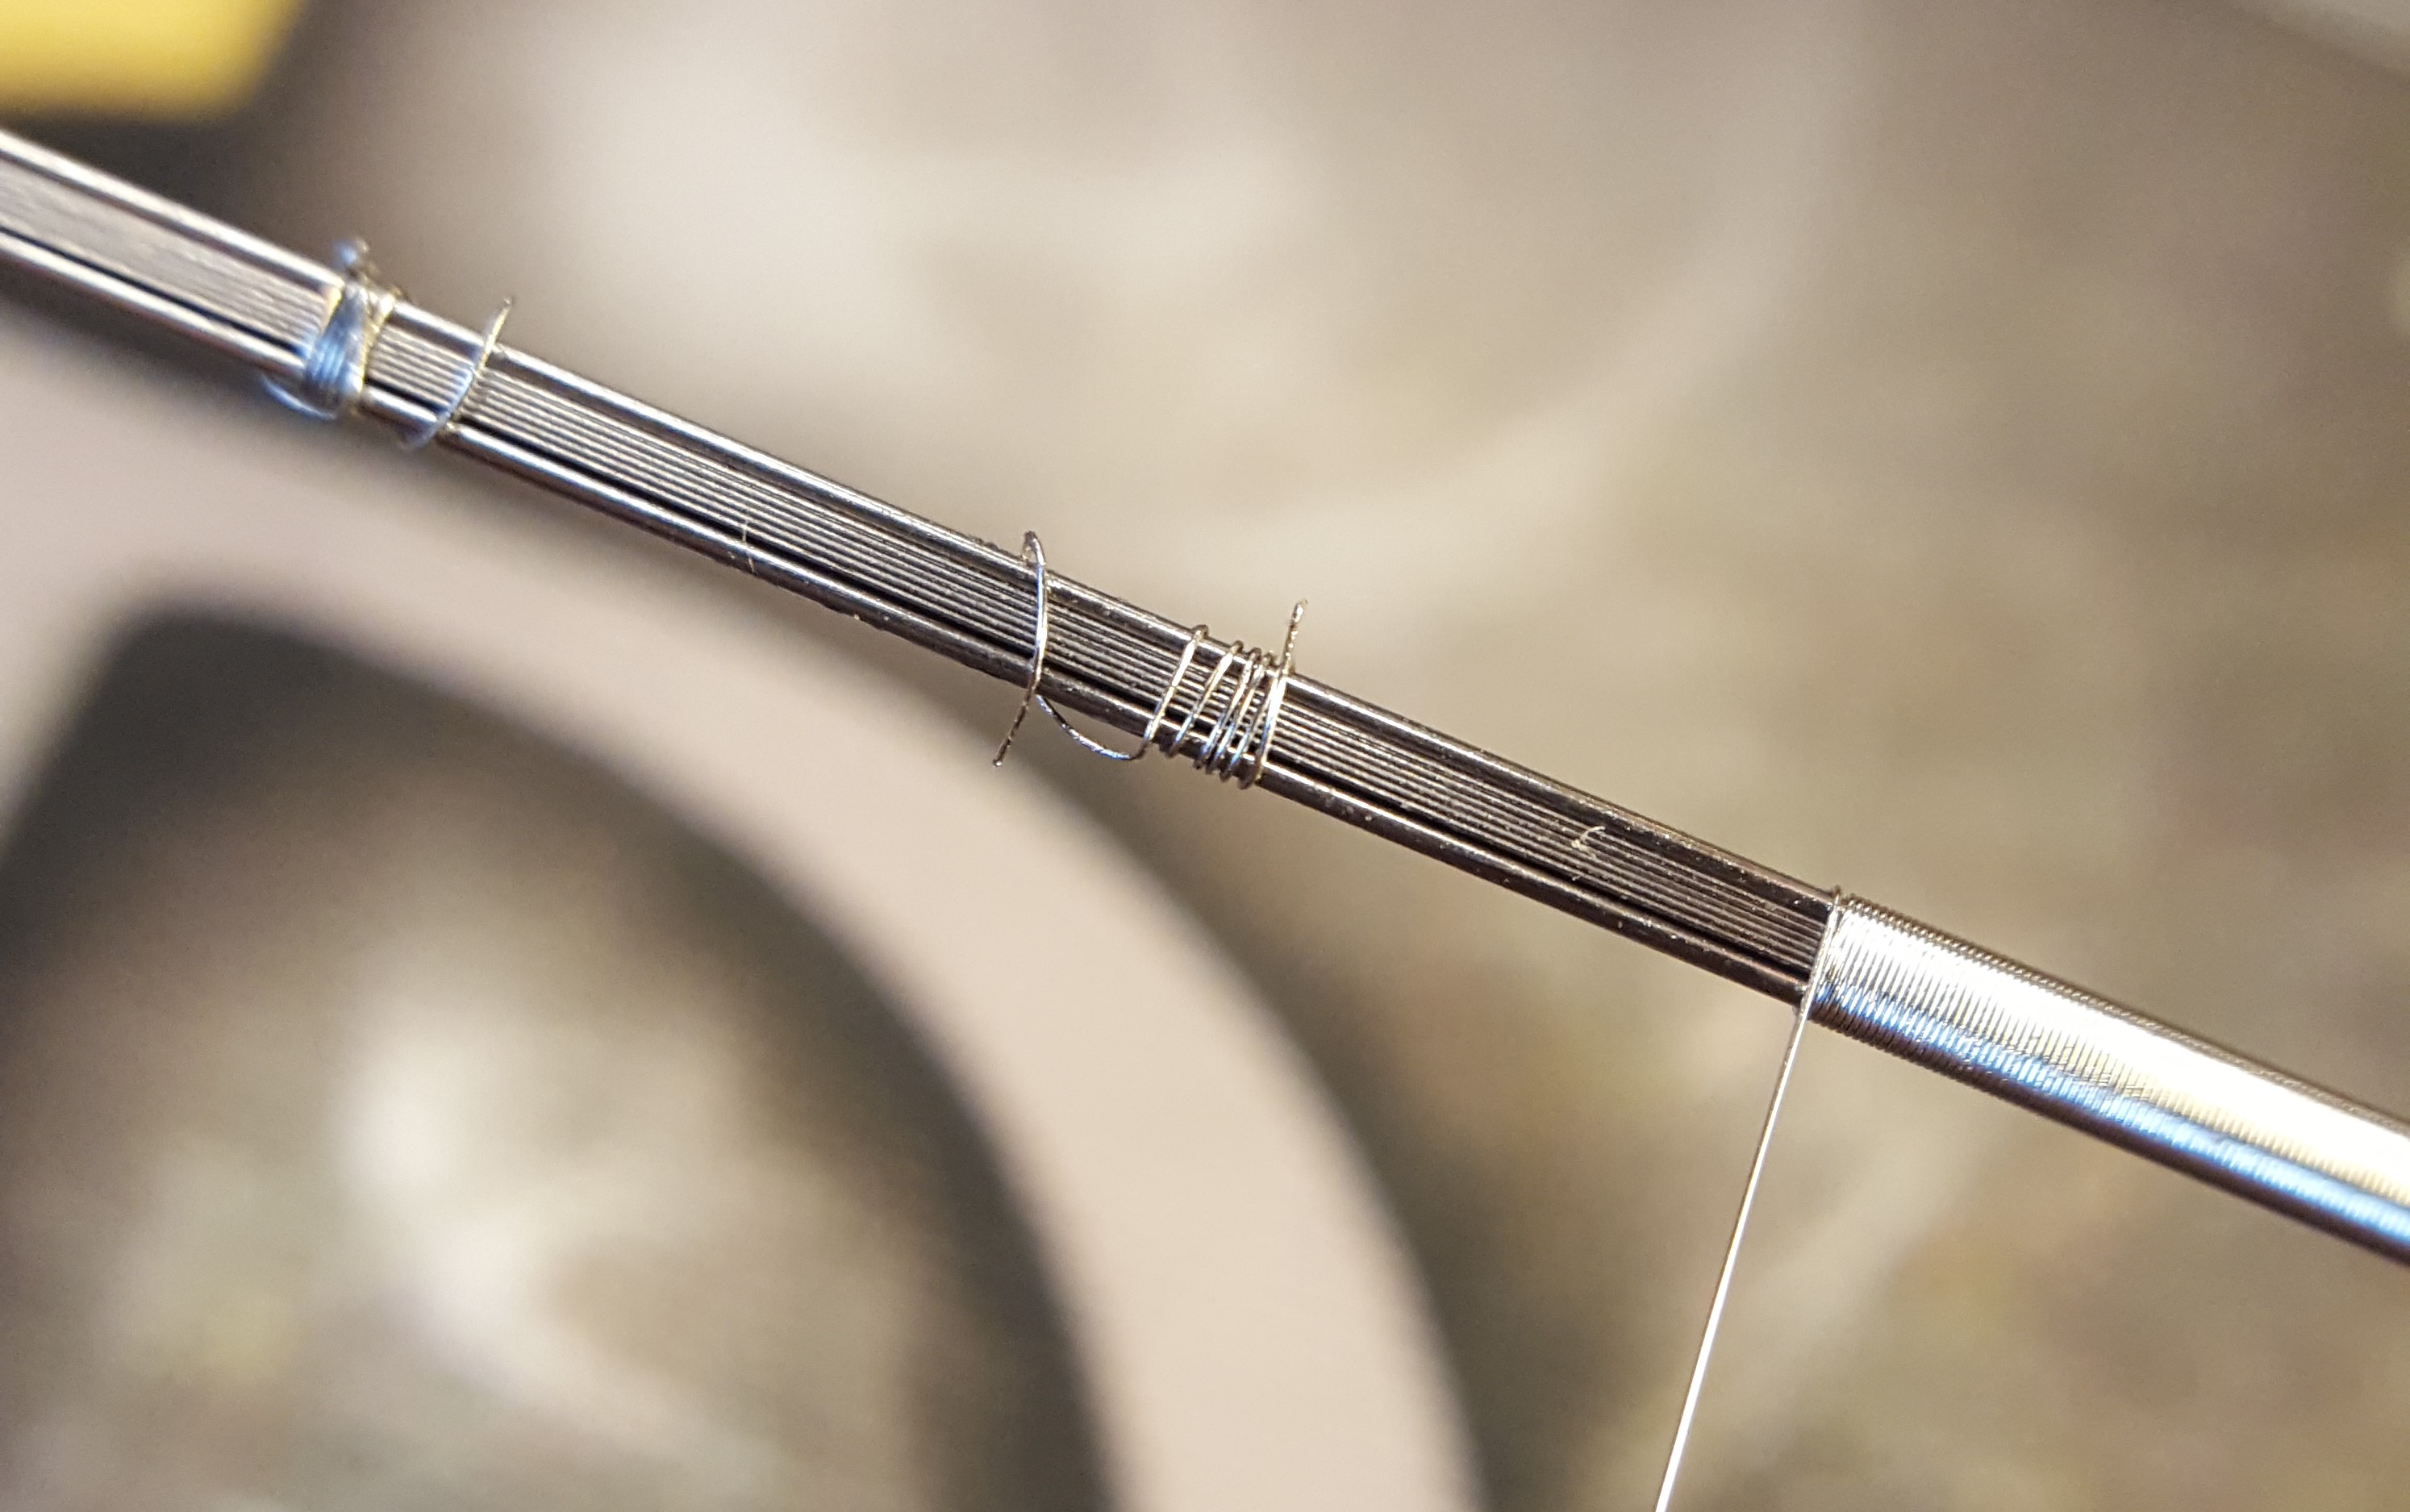
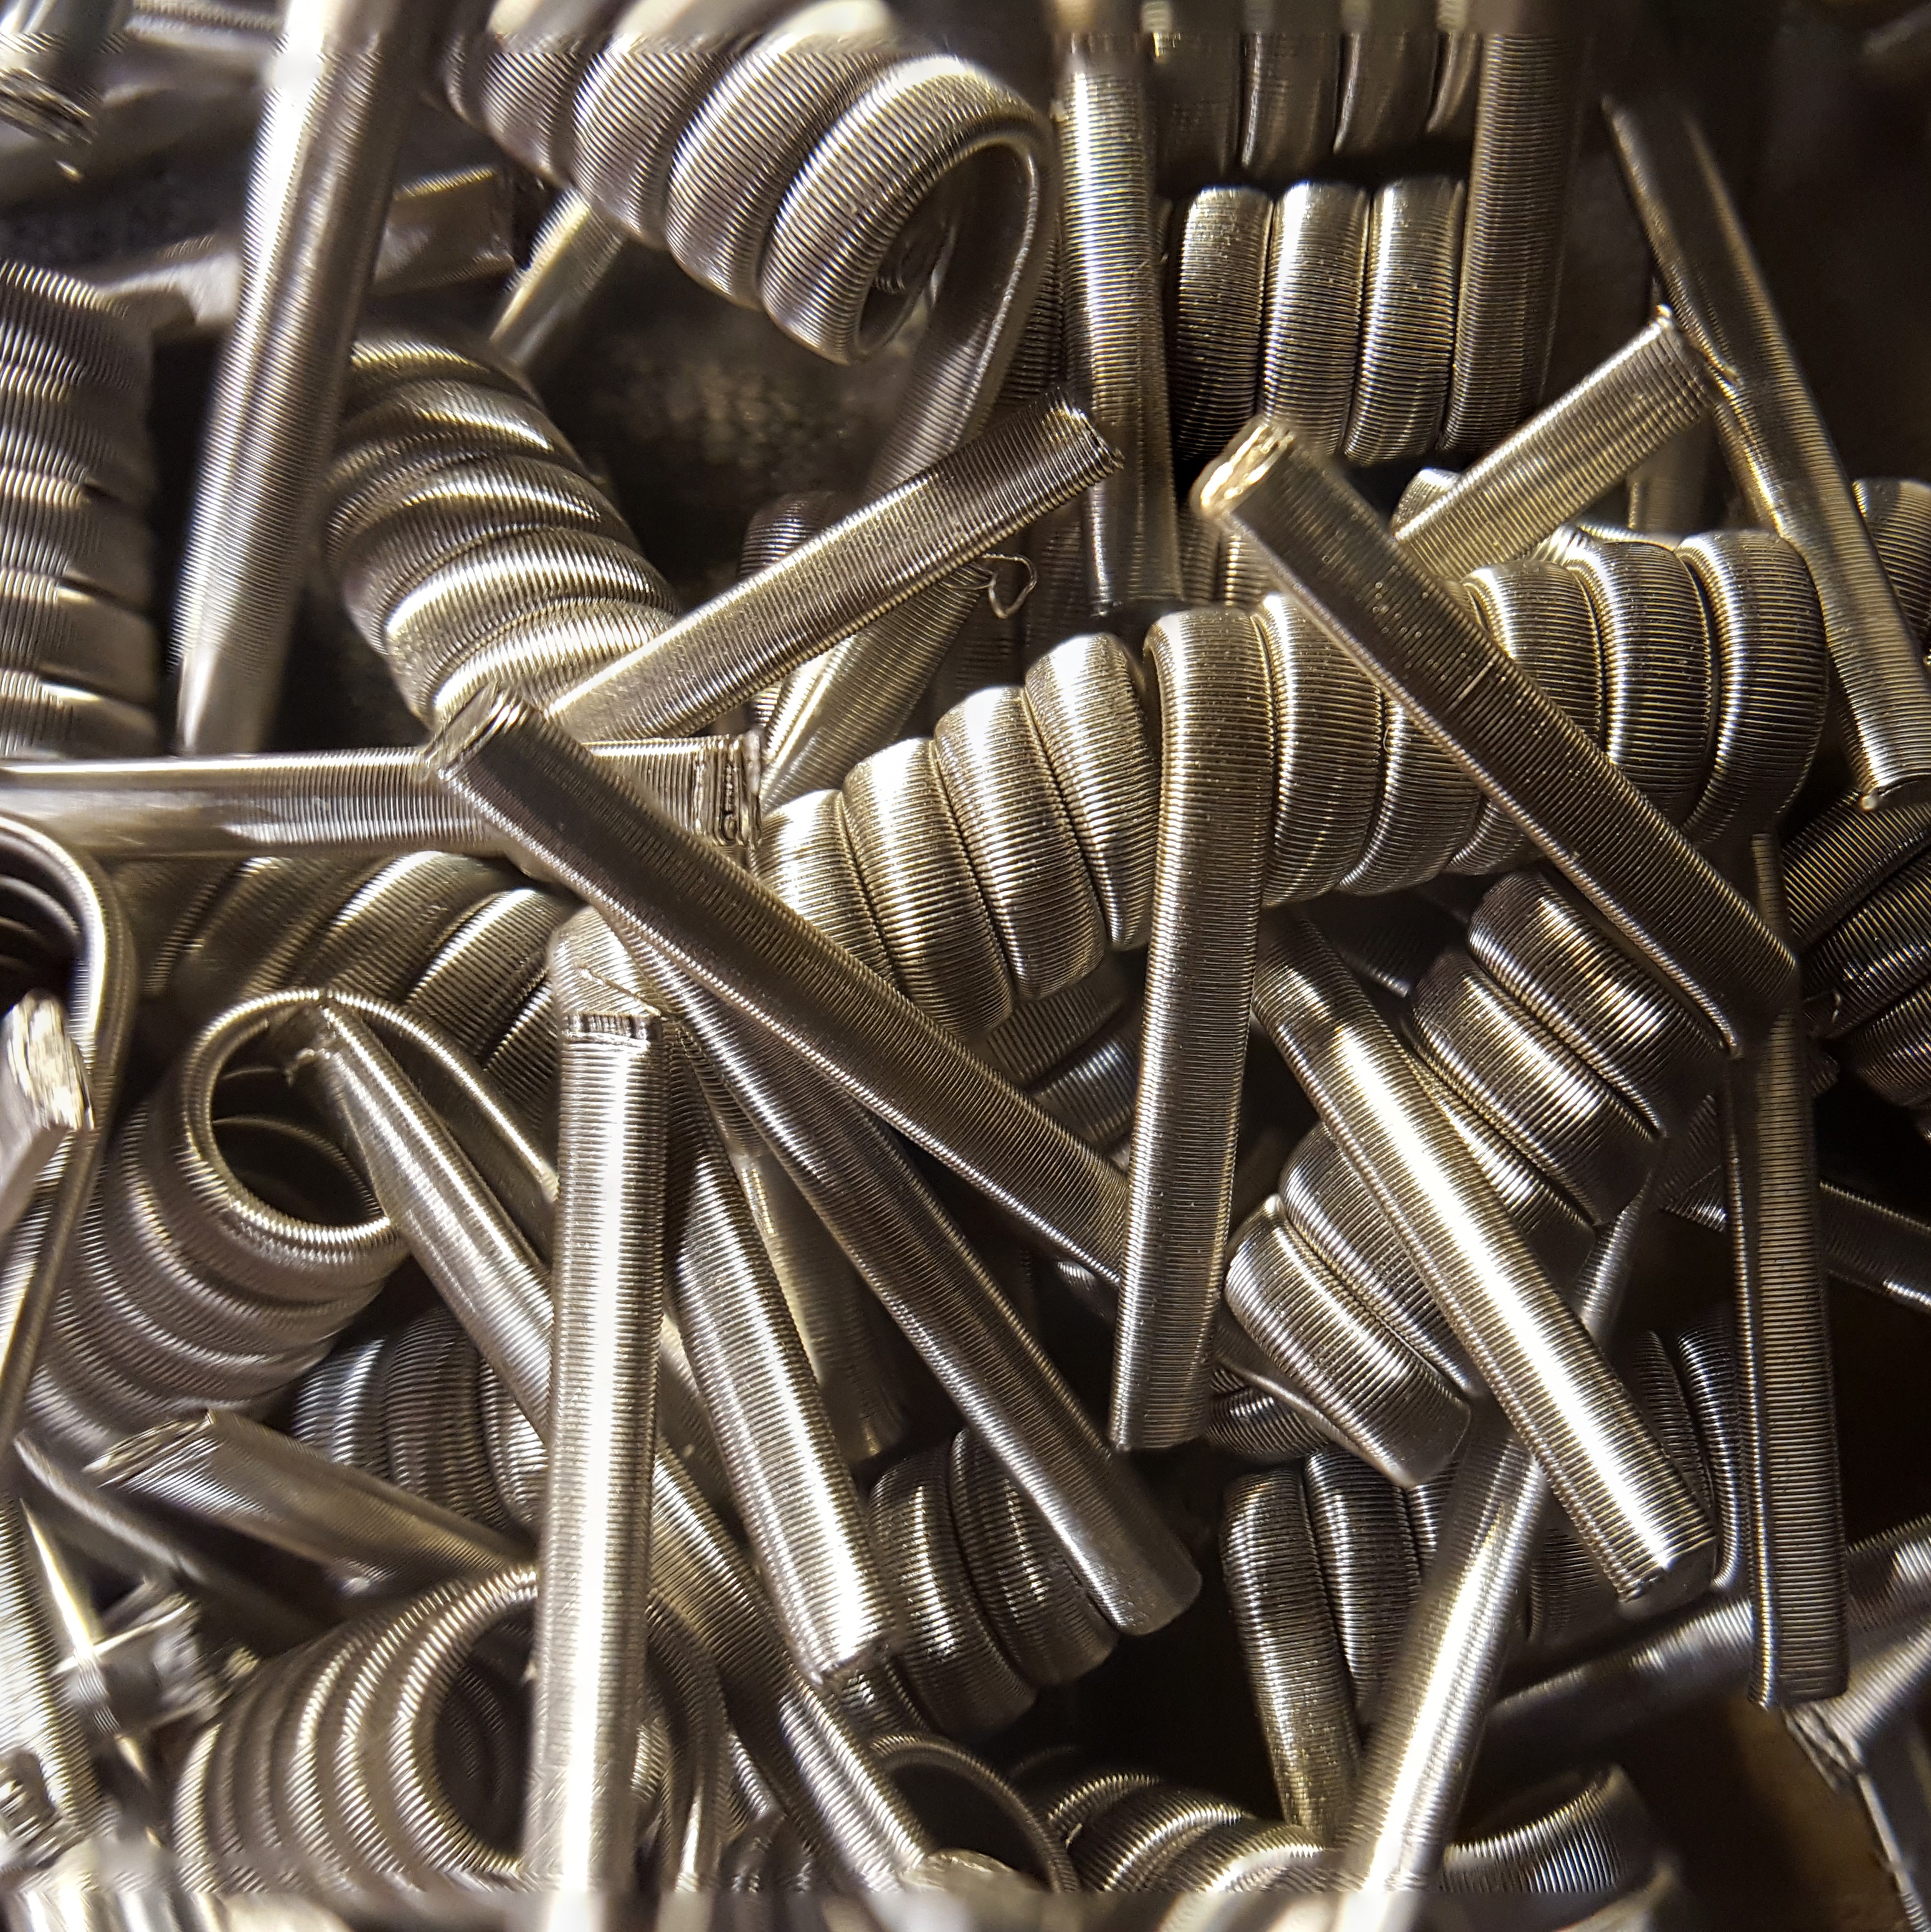
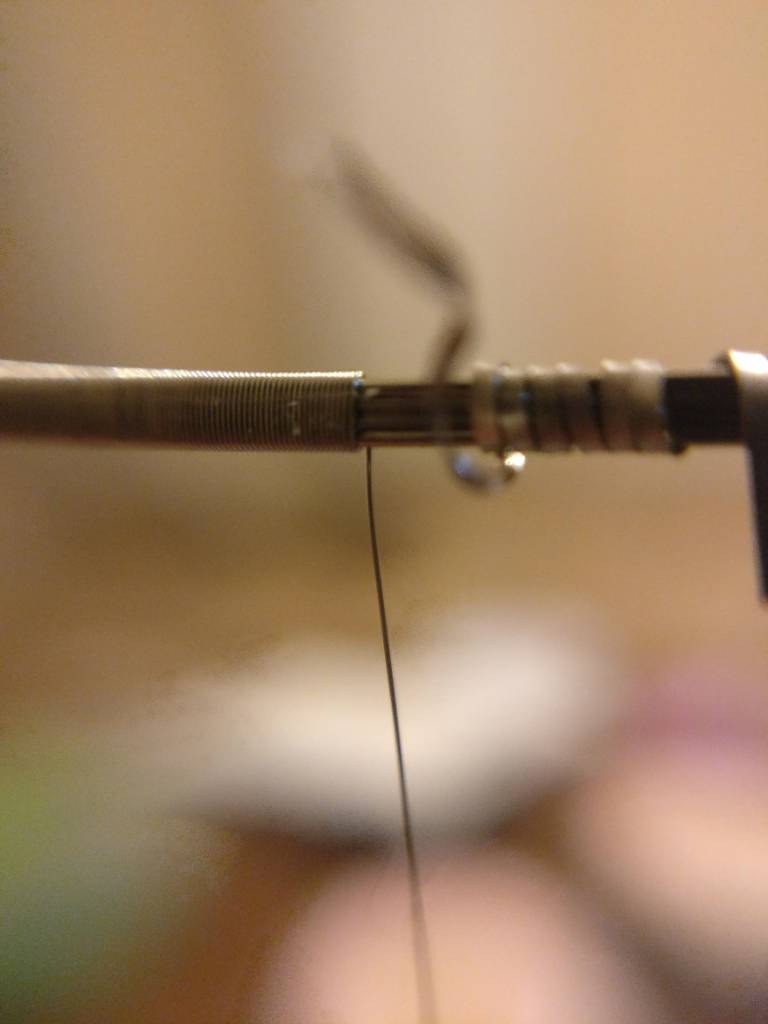
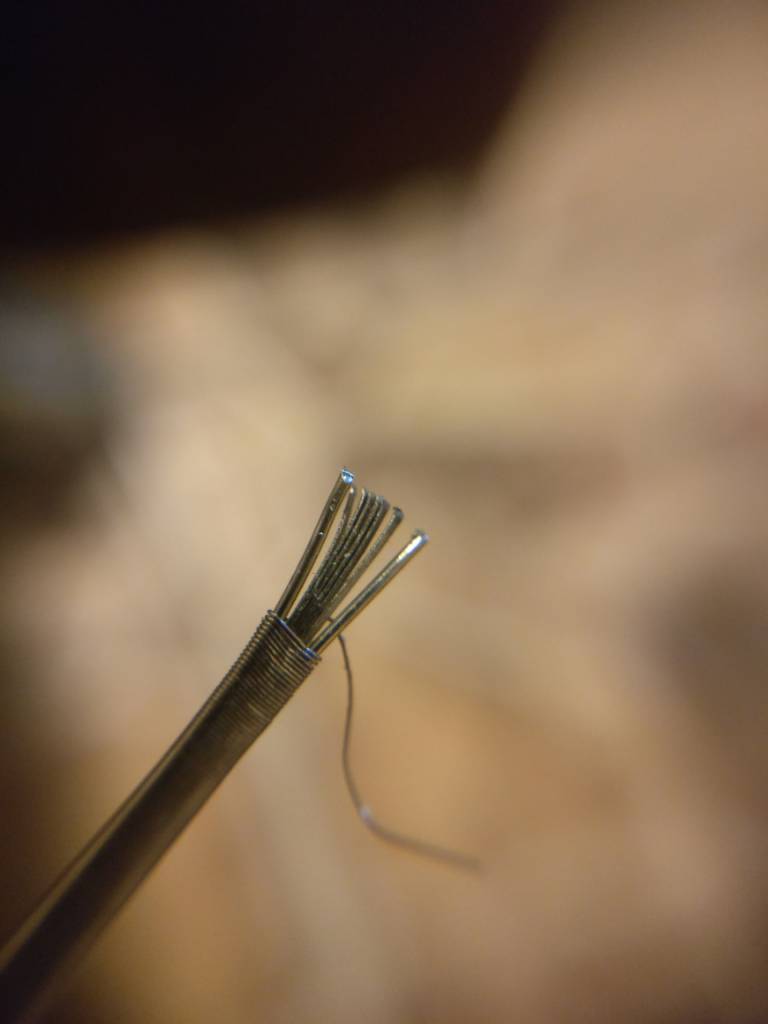
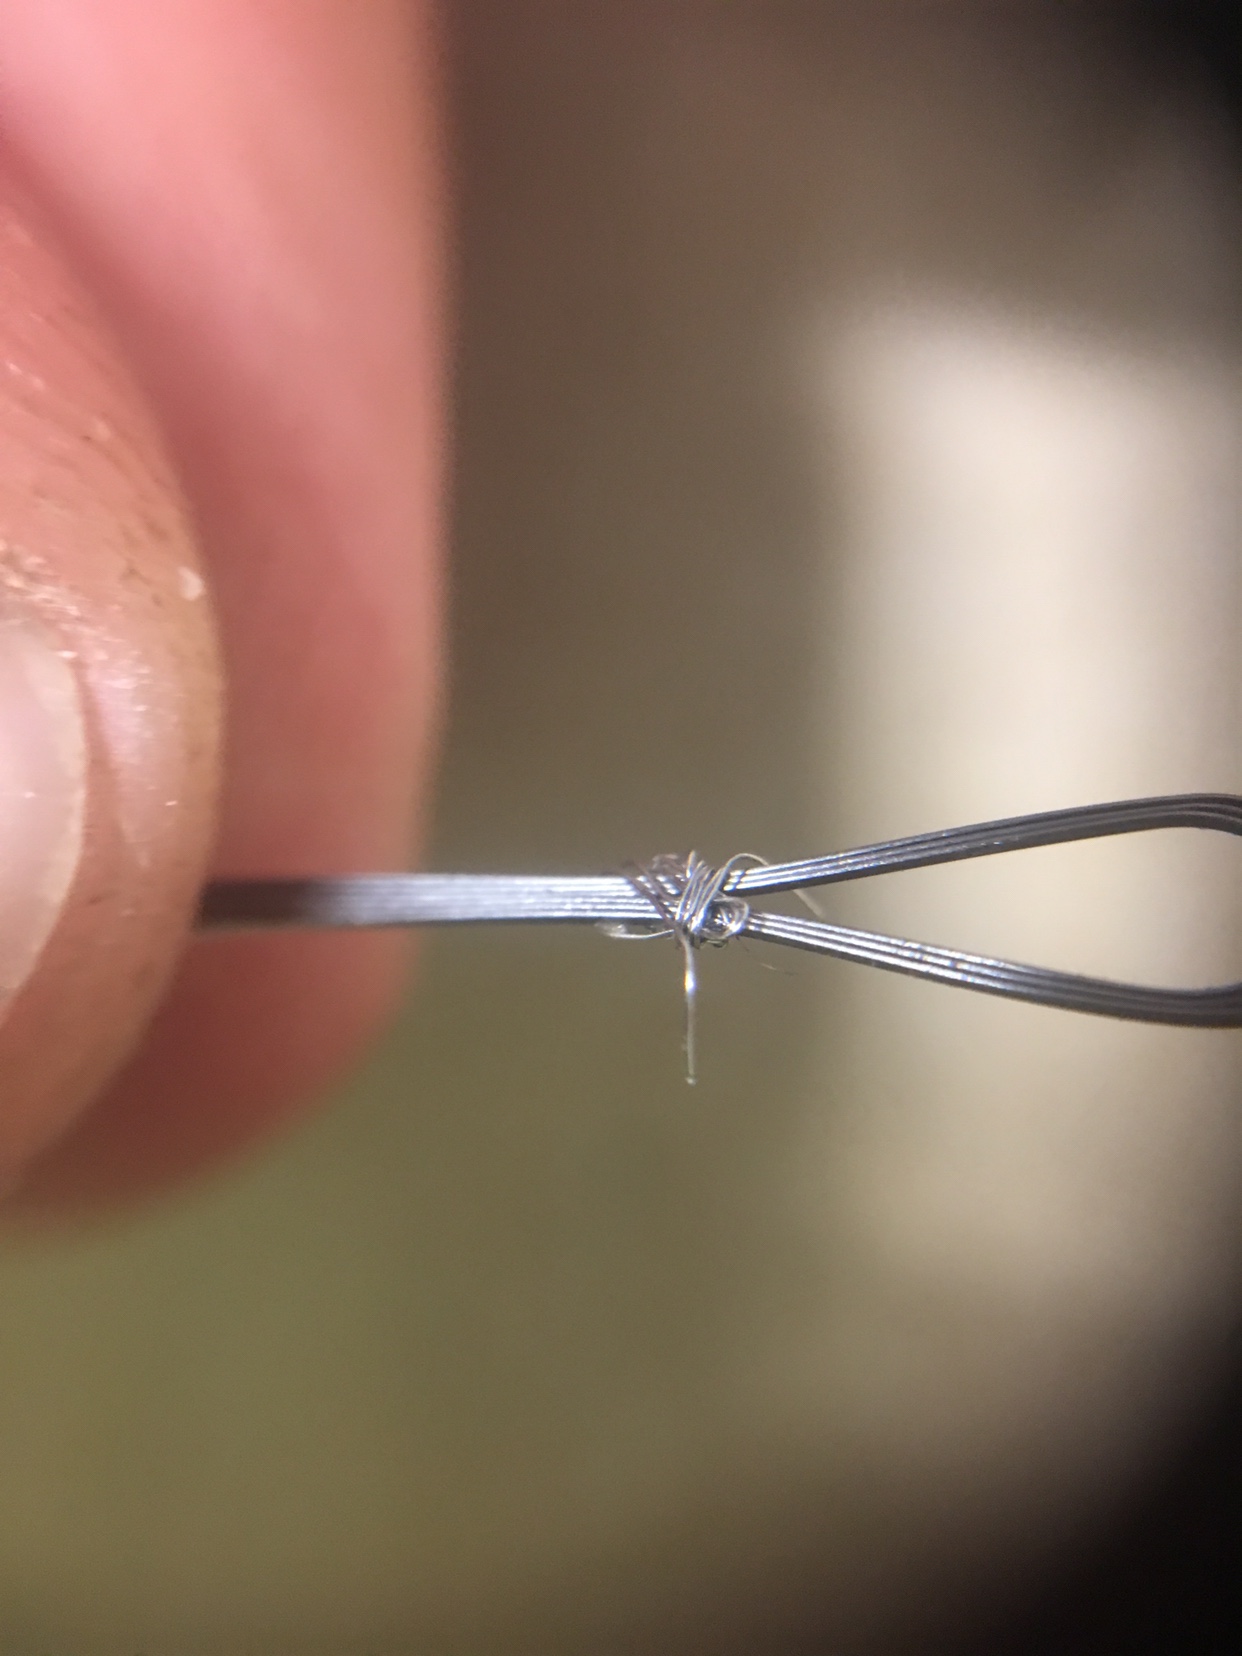
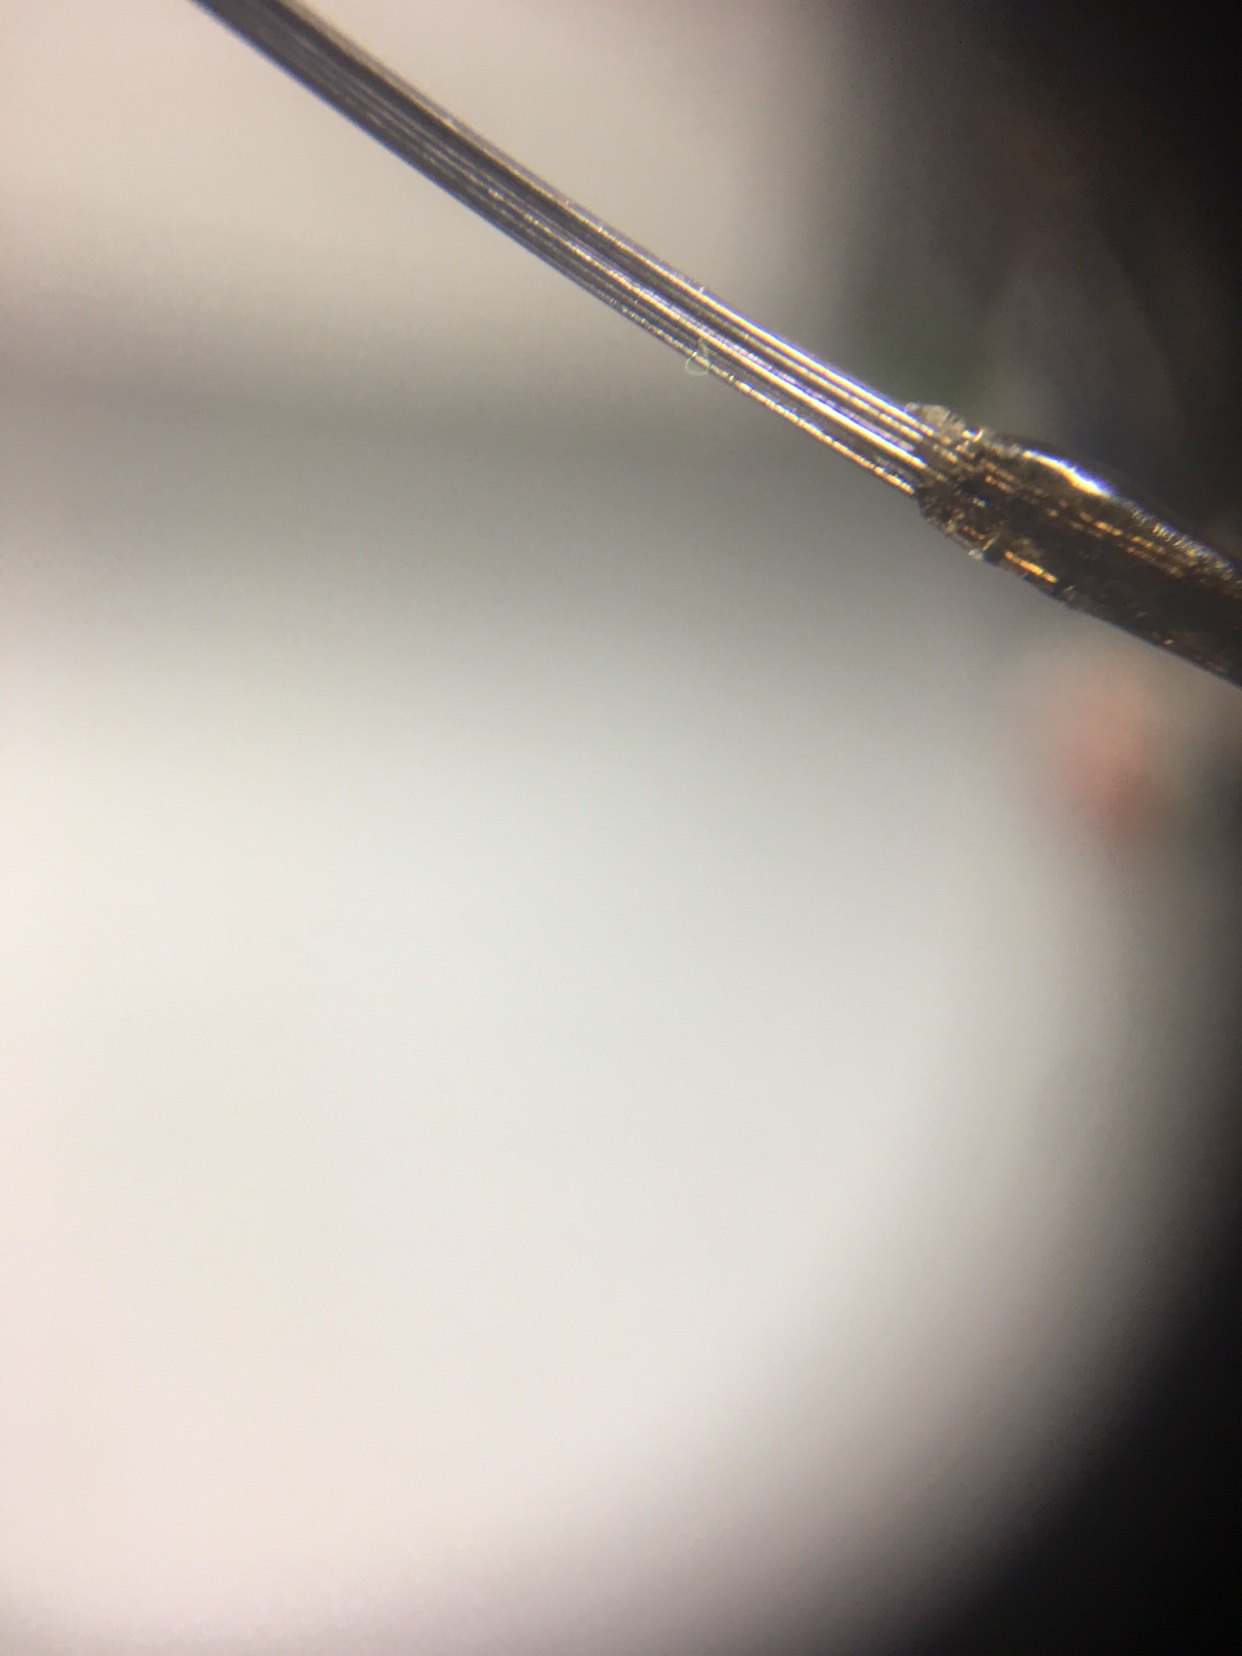
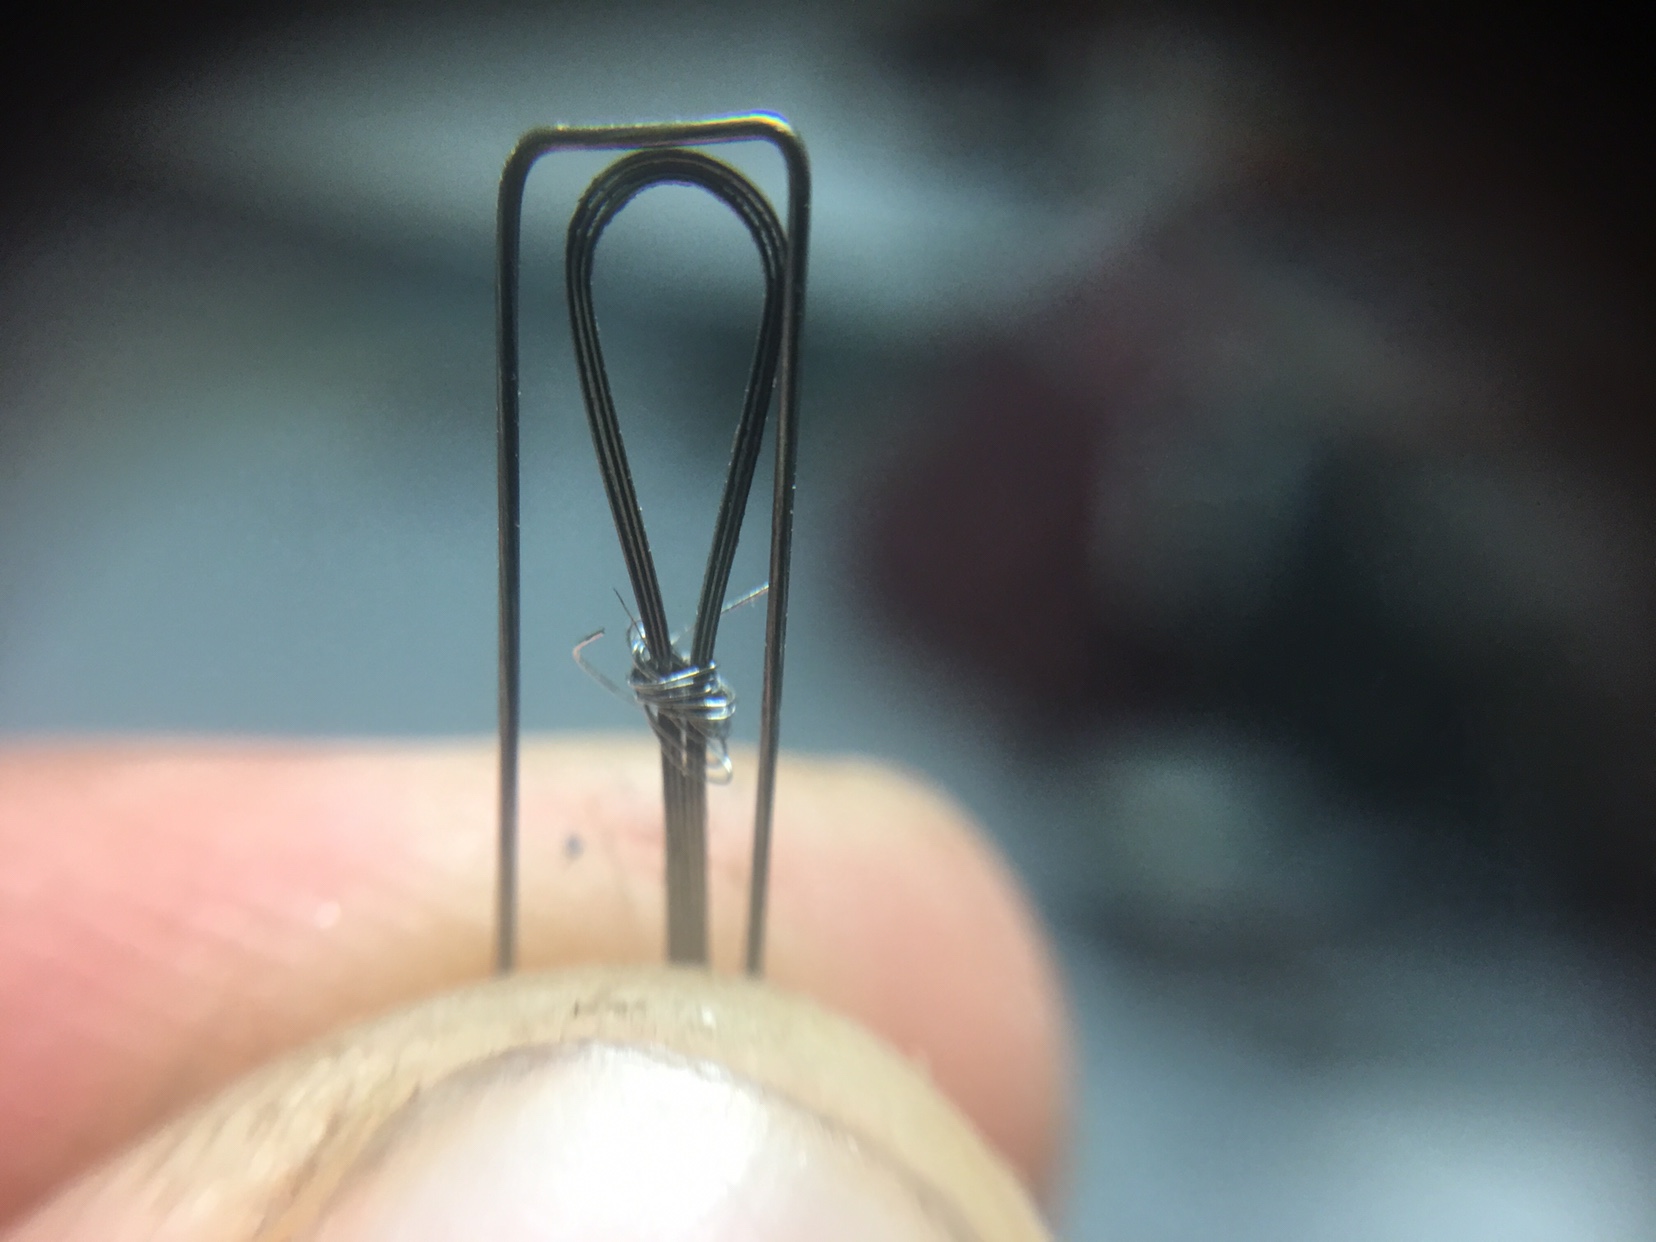
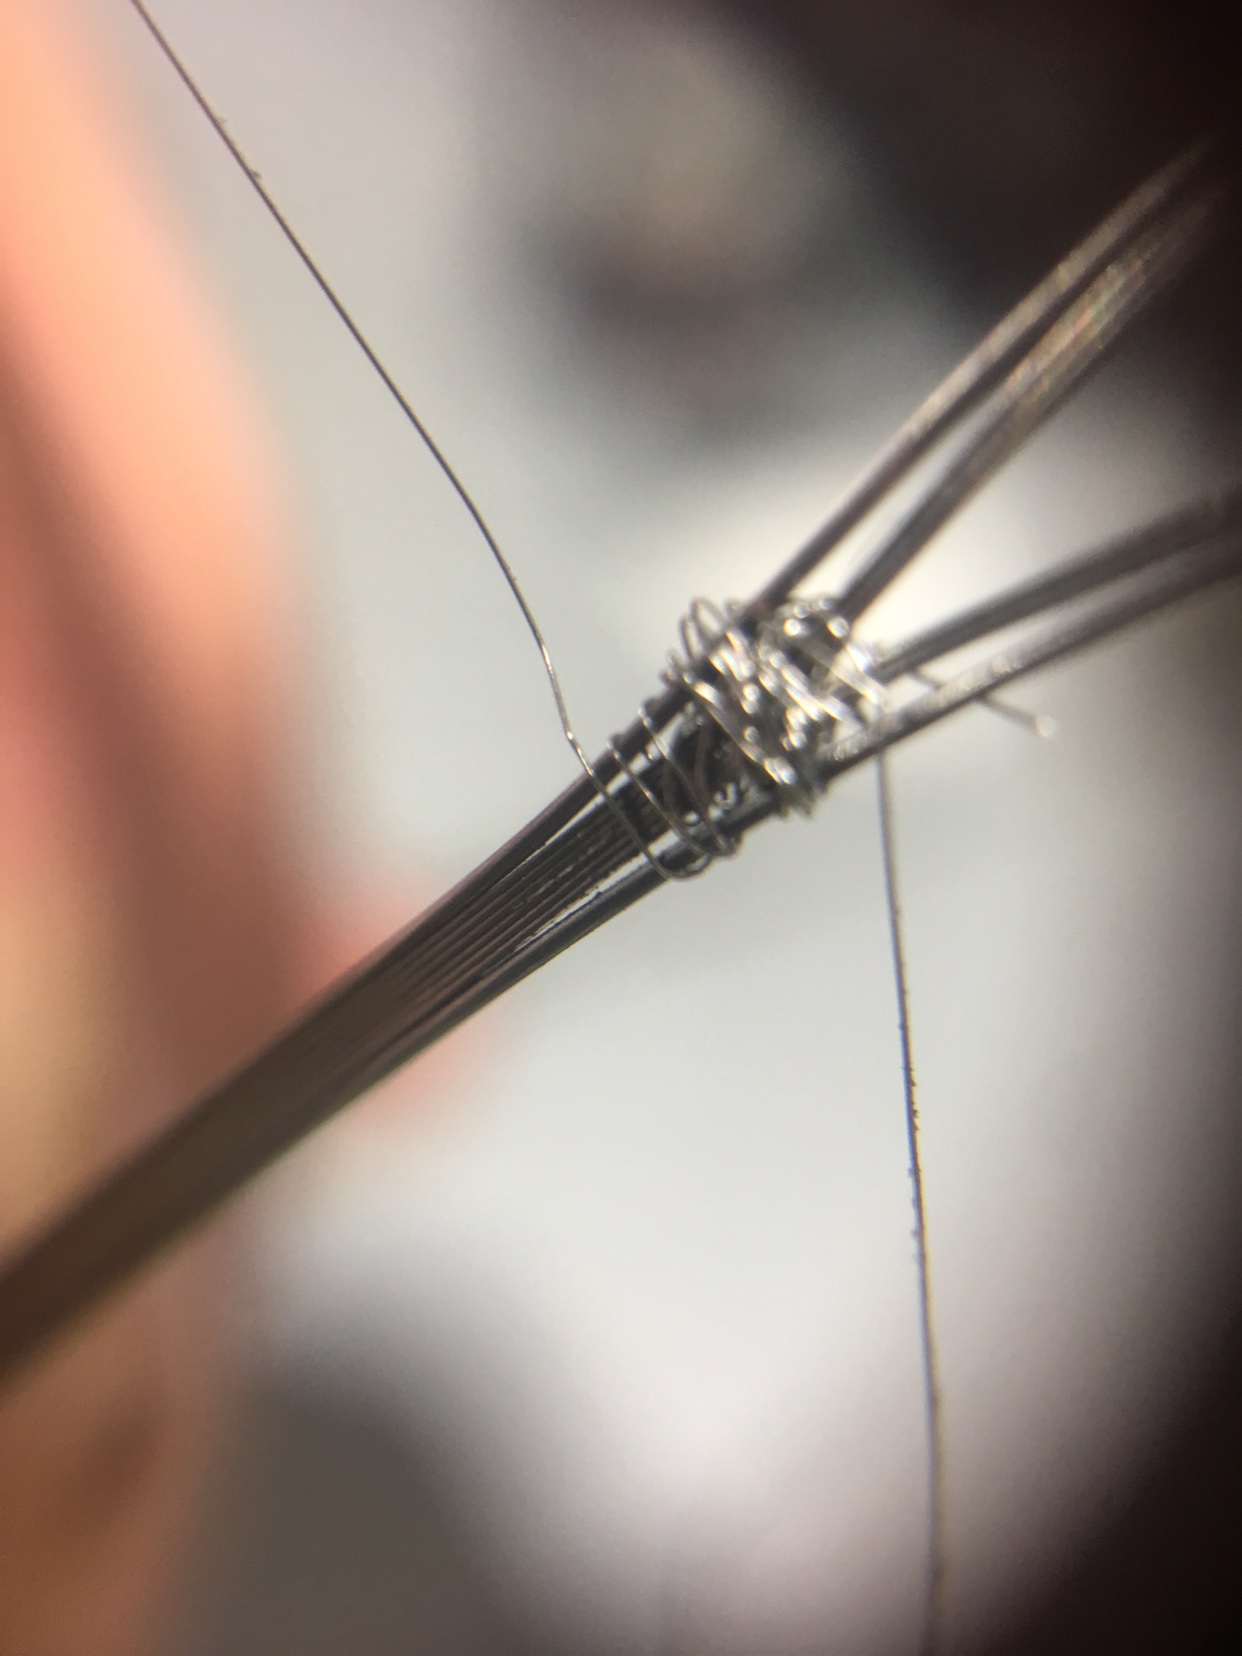
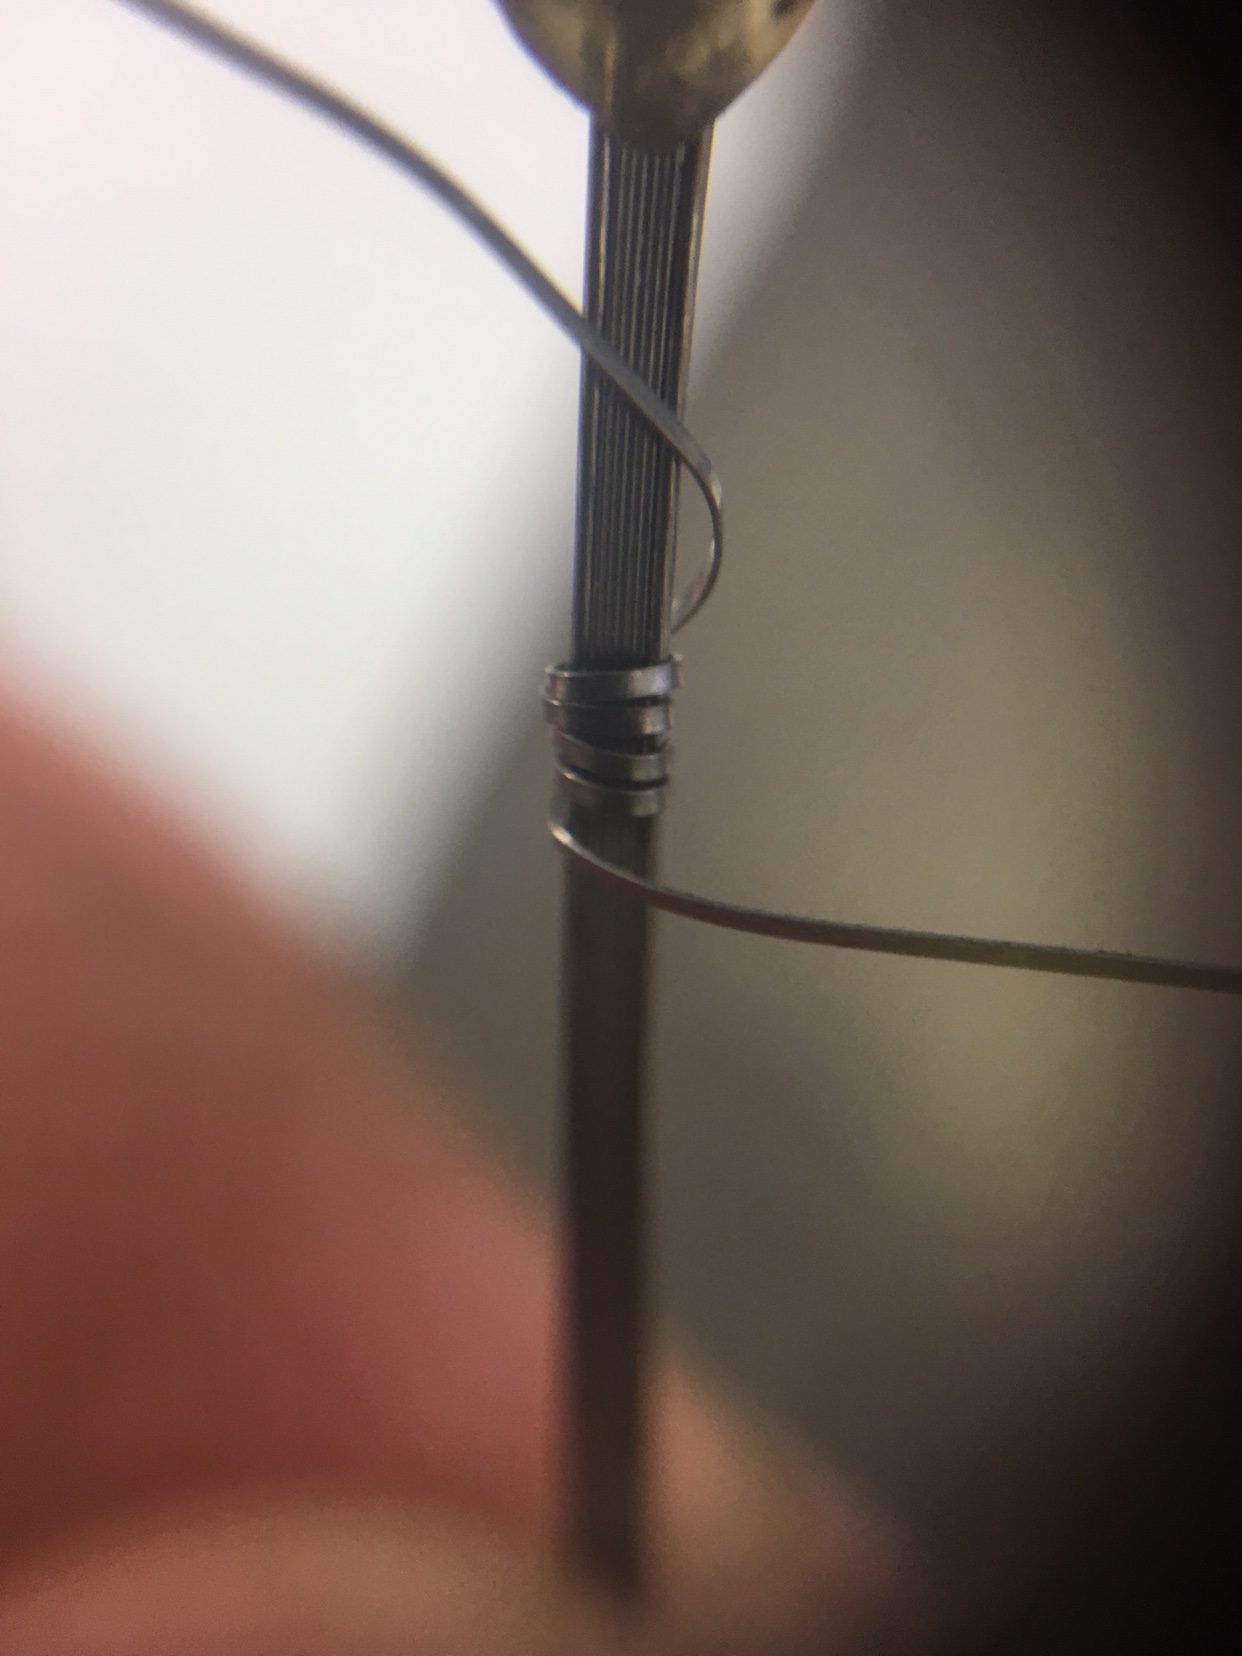
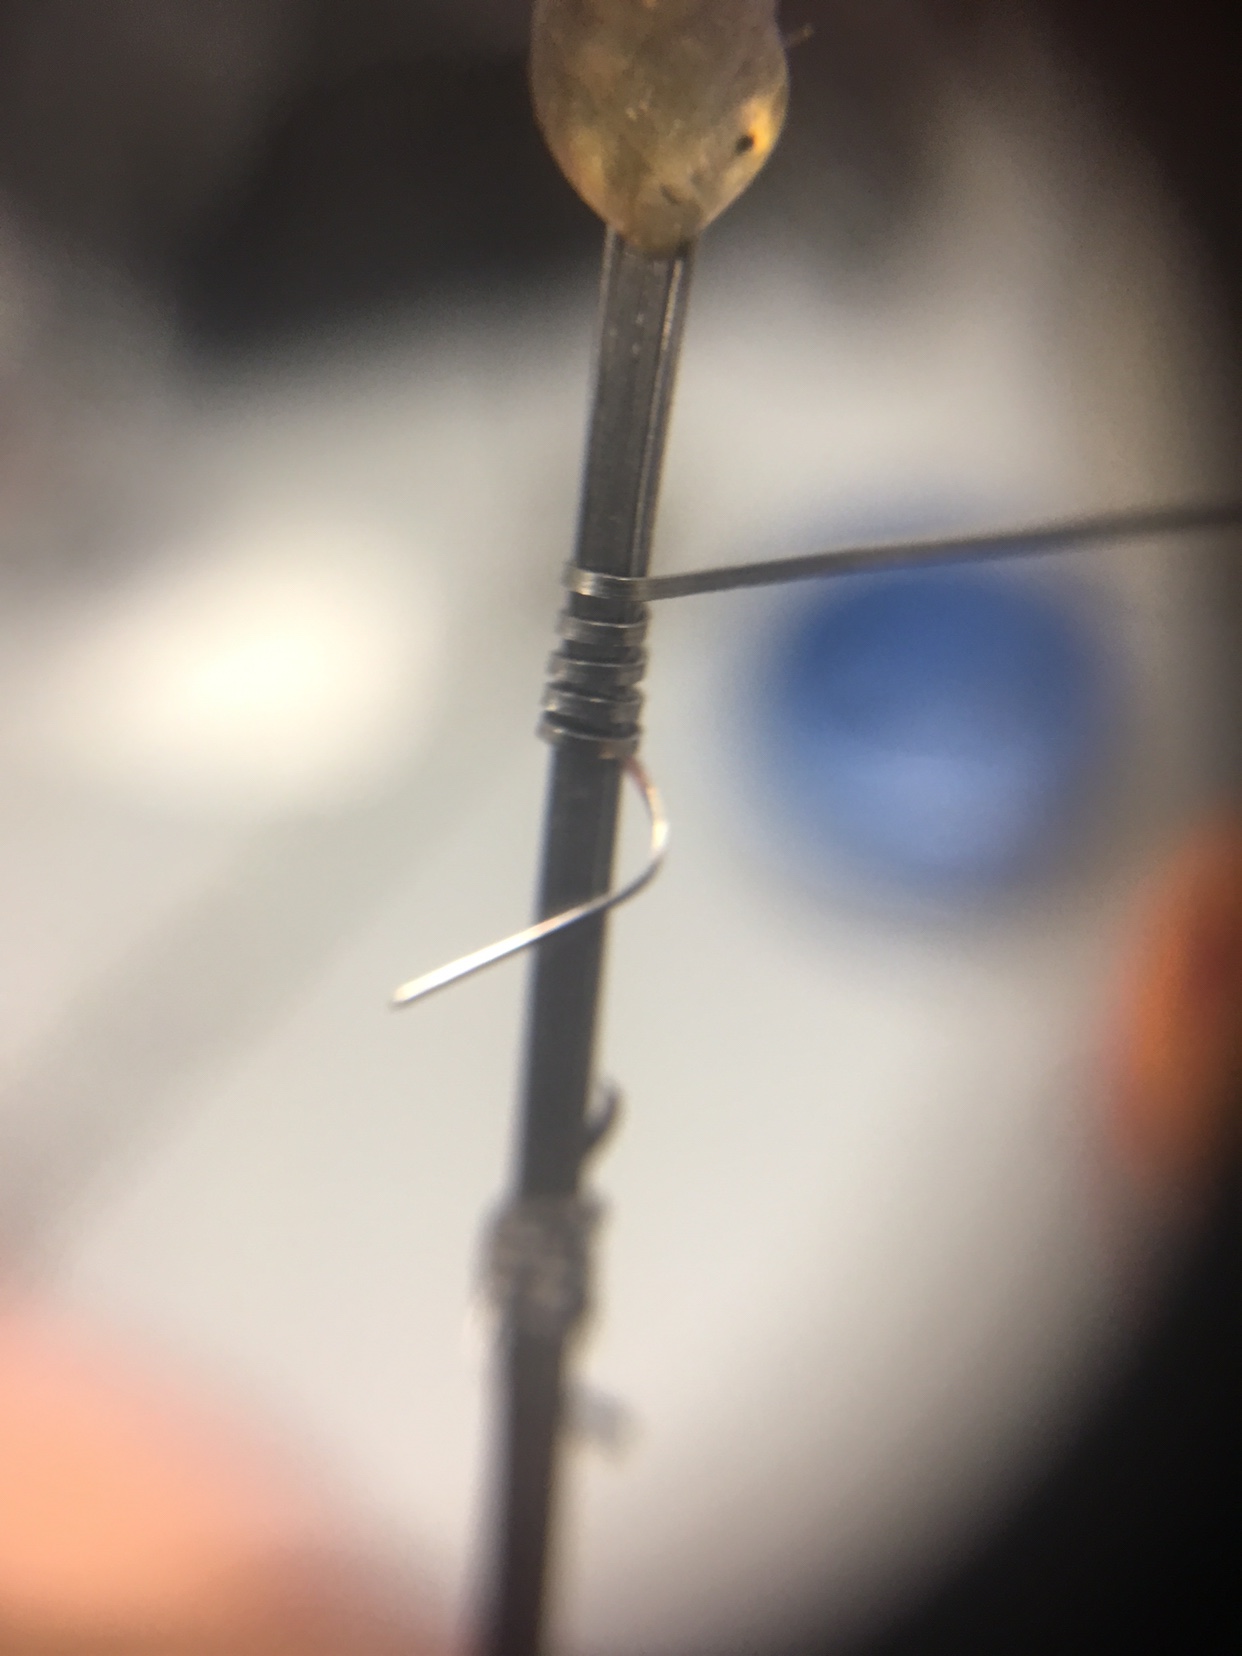
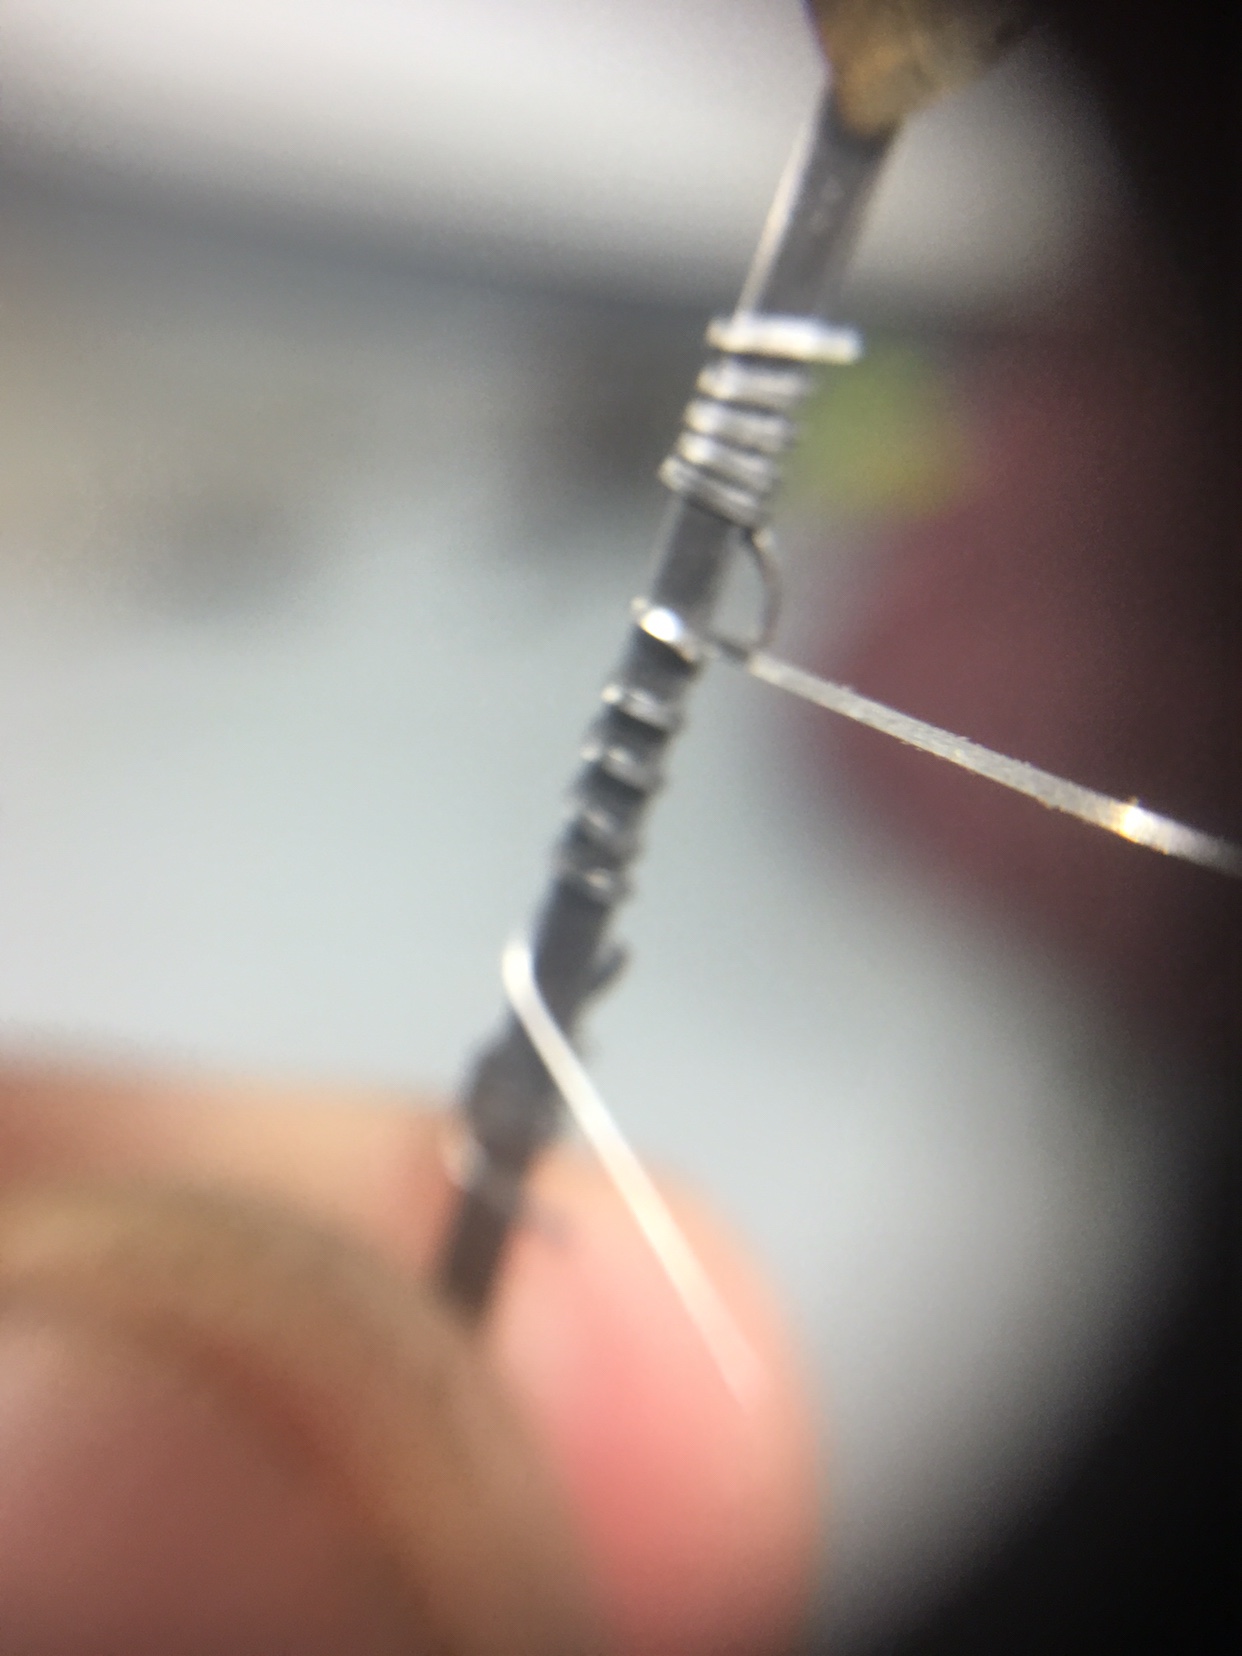
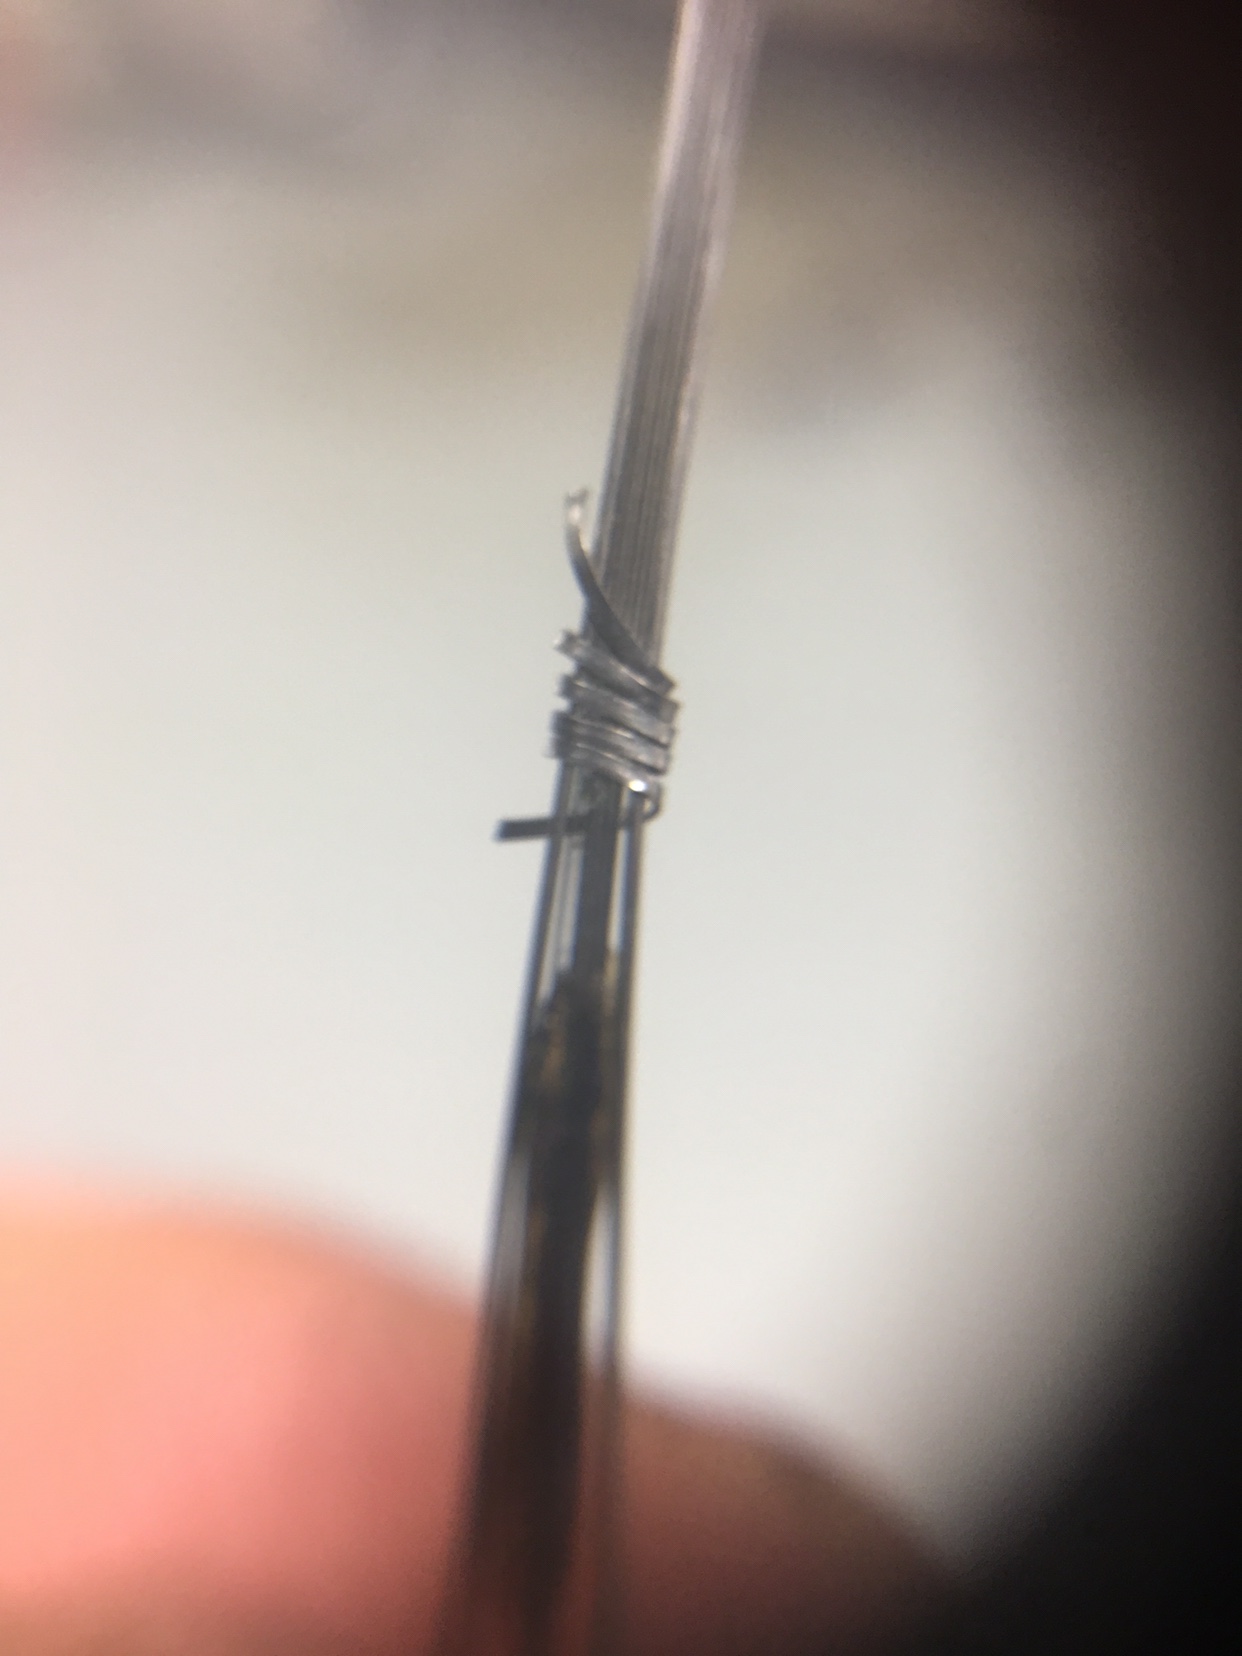
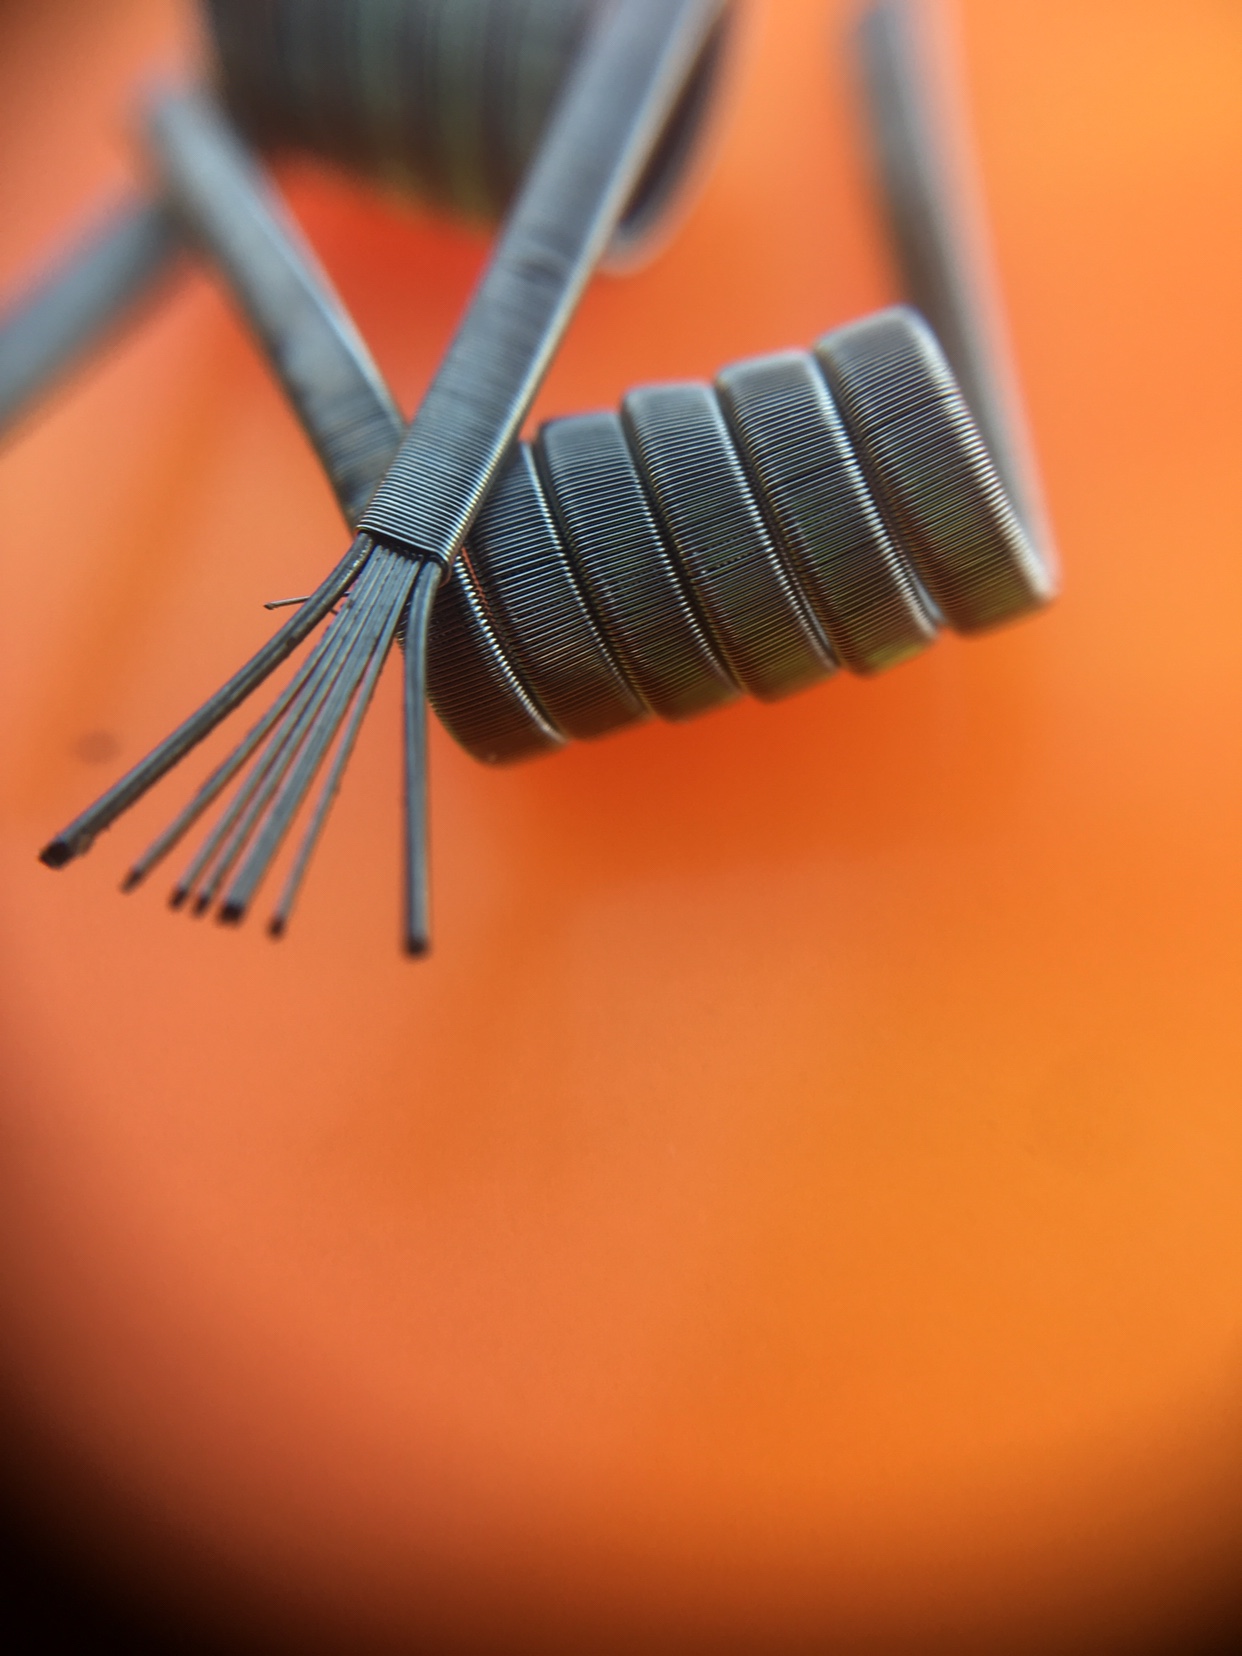
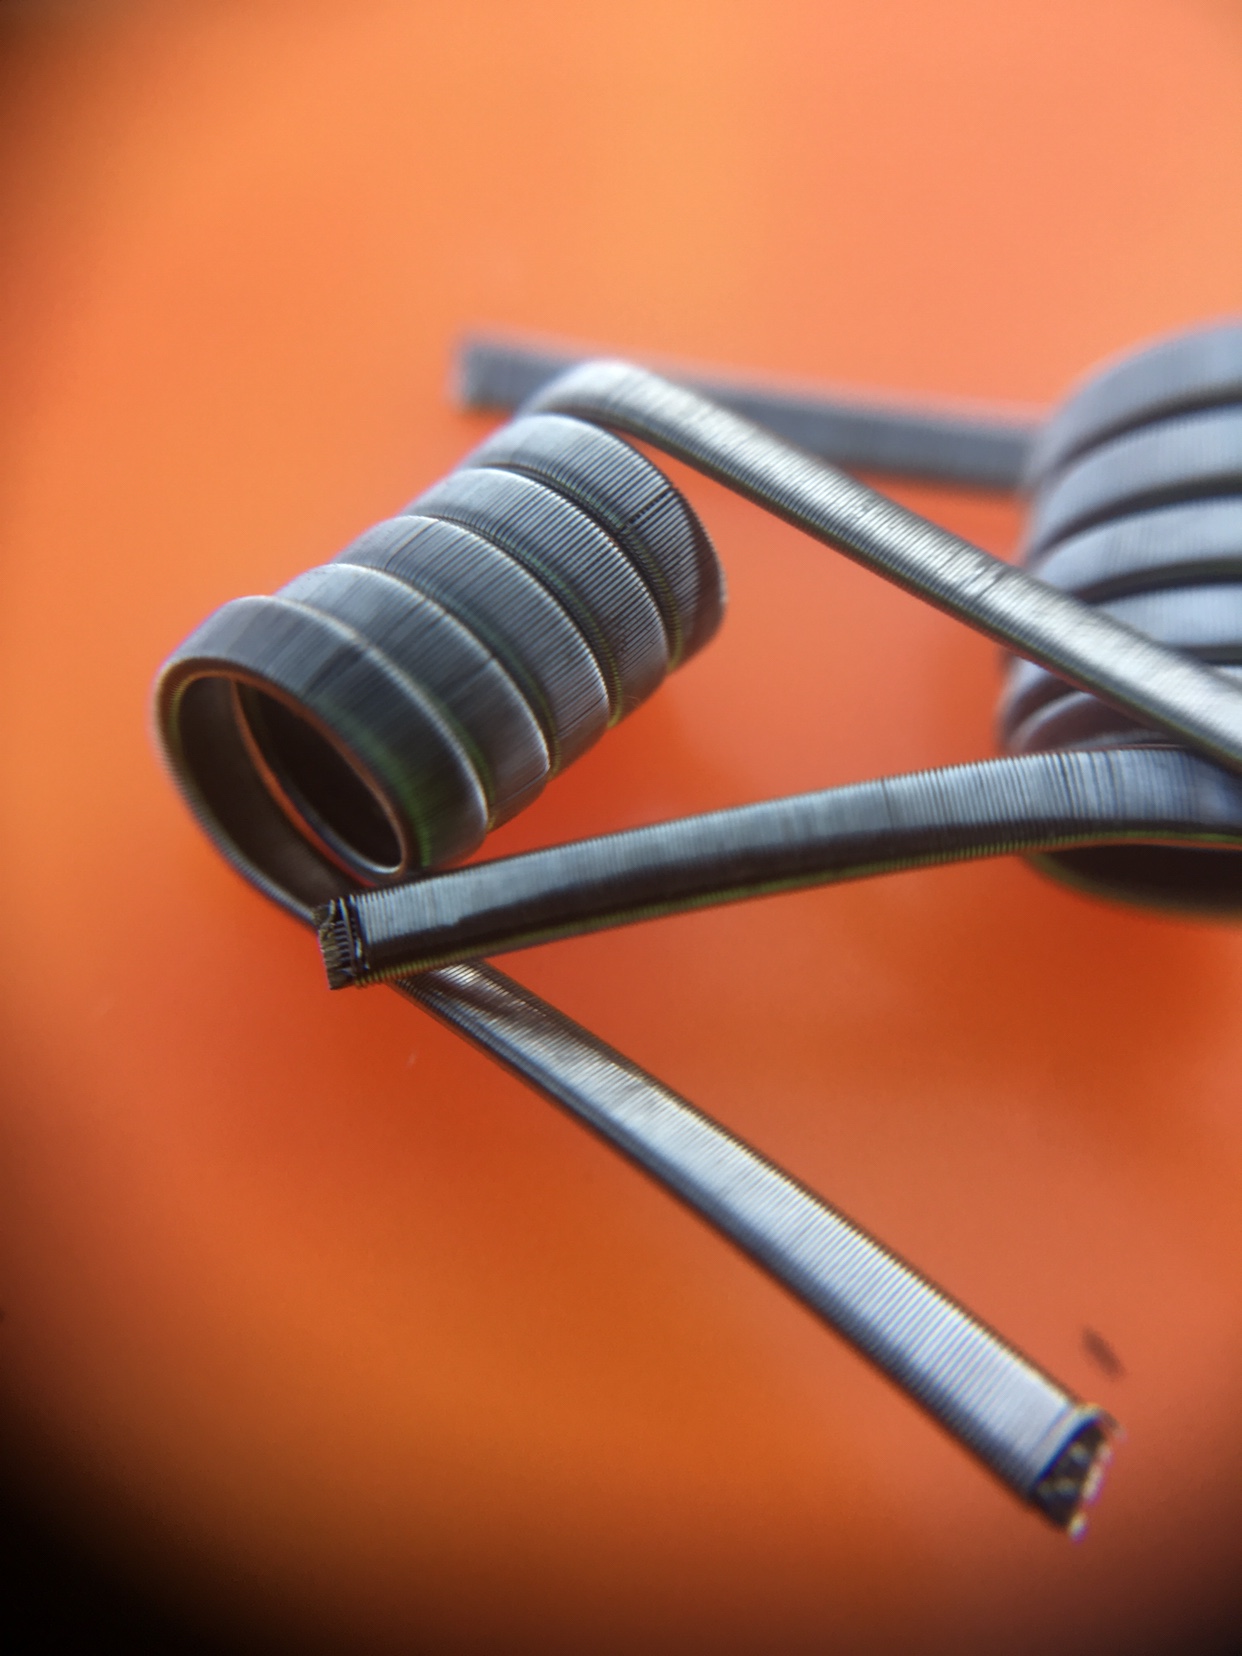
coil info: a default staple coil is made from stacked ribbon wire, which is then clapton wrapped.

there are a lot of variants of this coil, including framed staples, alien staples, alien framed staples, stapled stagger fused claptons, stapled staggertons and many more. stacked ribbon wire is an ingredient in just about everything, so i consider it to be one of the fundamental techniques to learn for anyone.

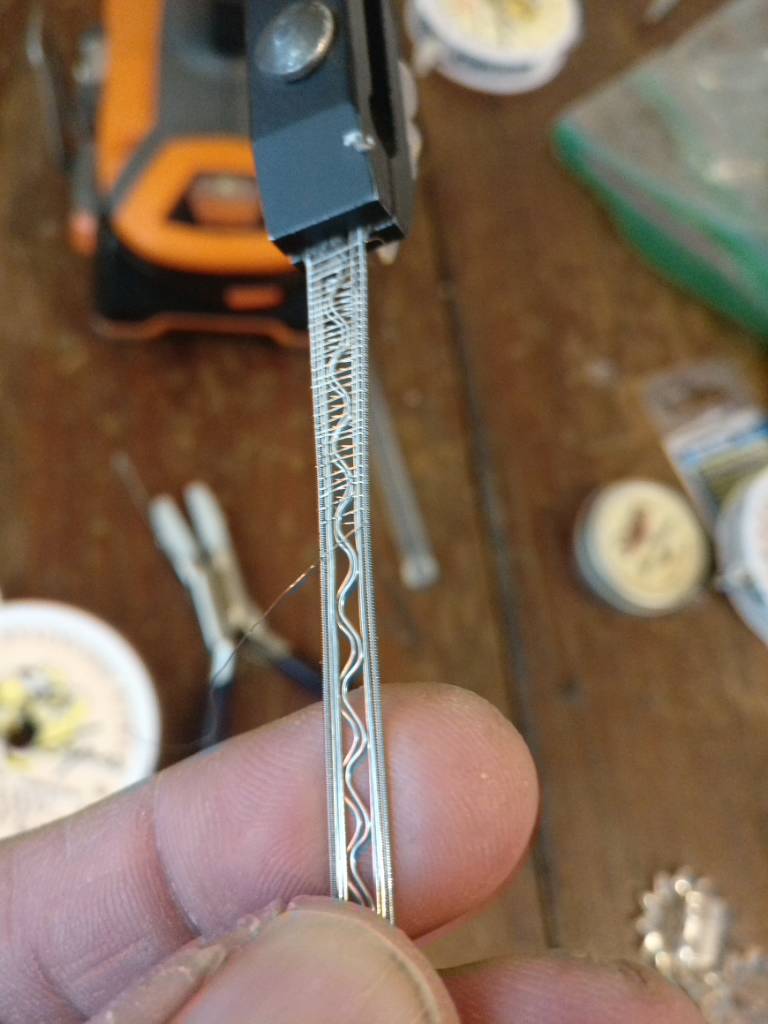
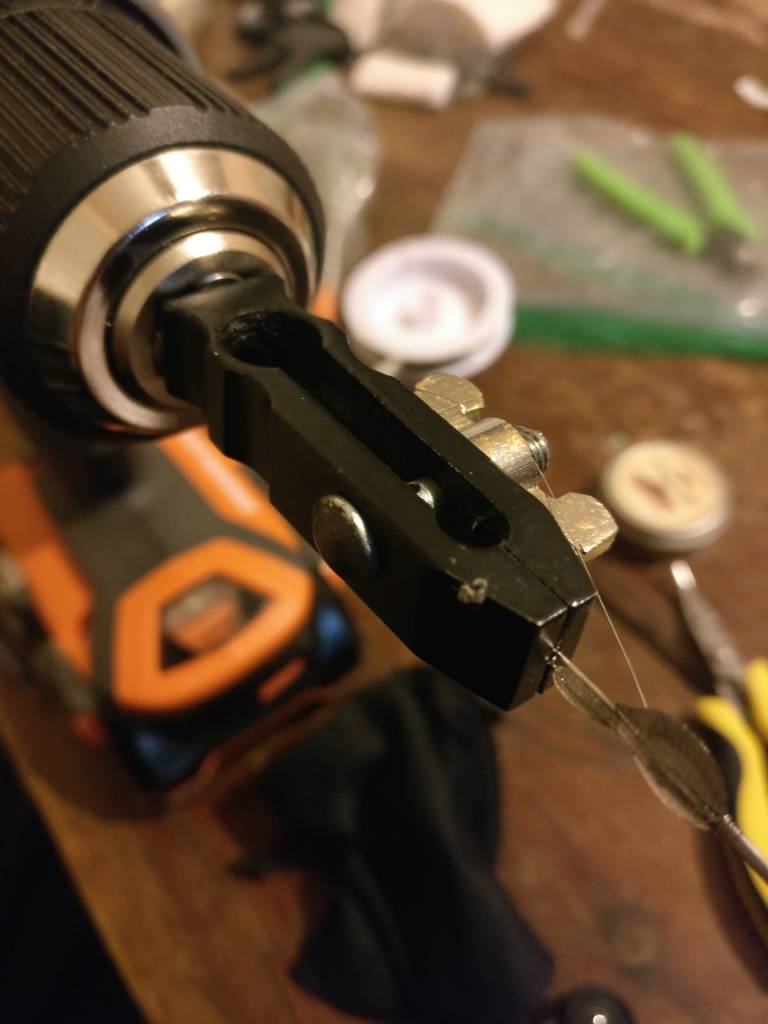
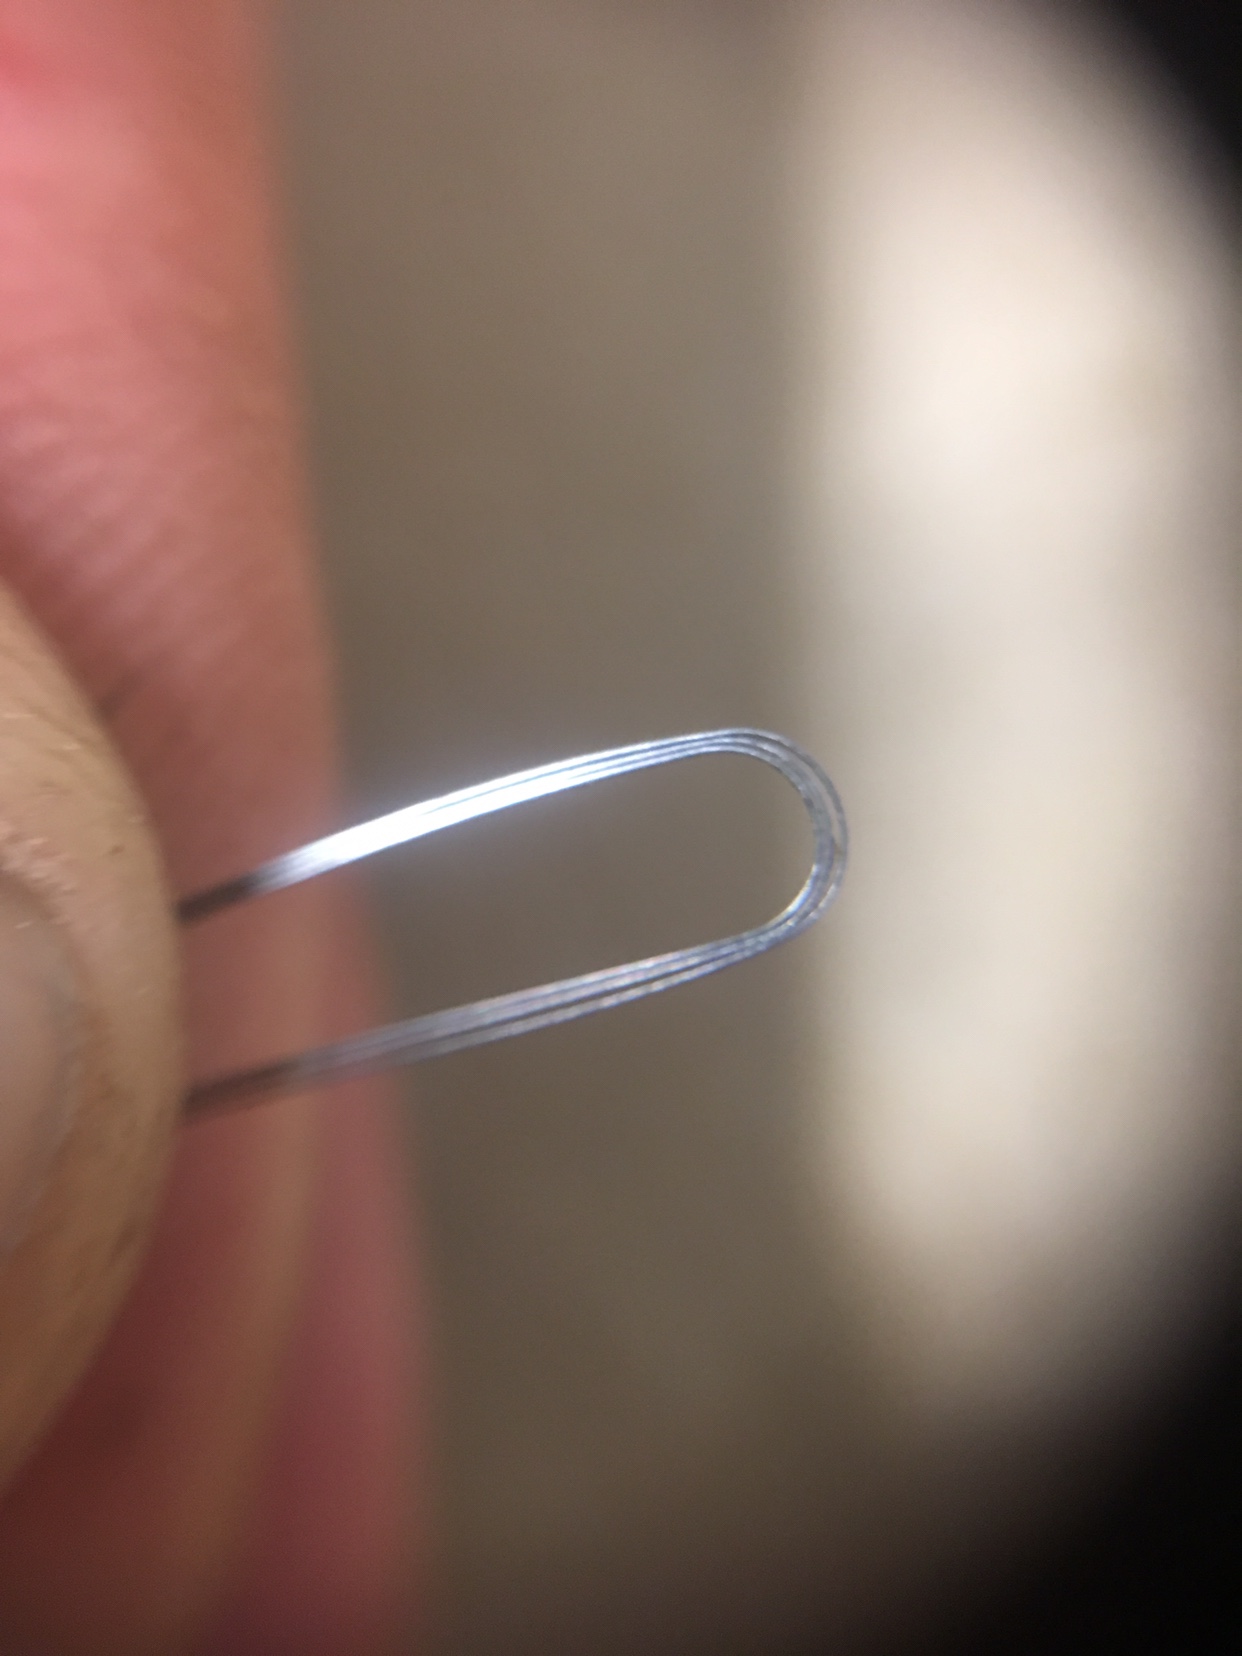
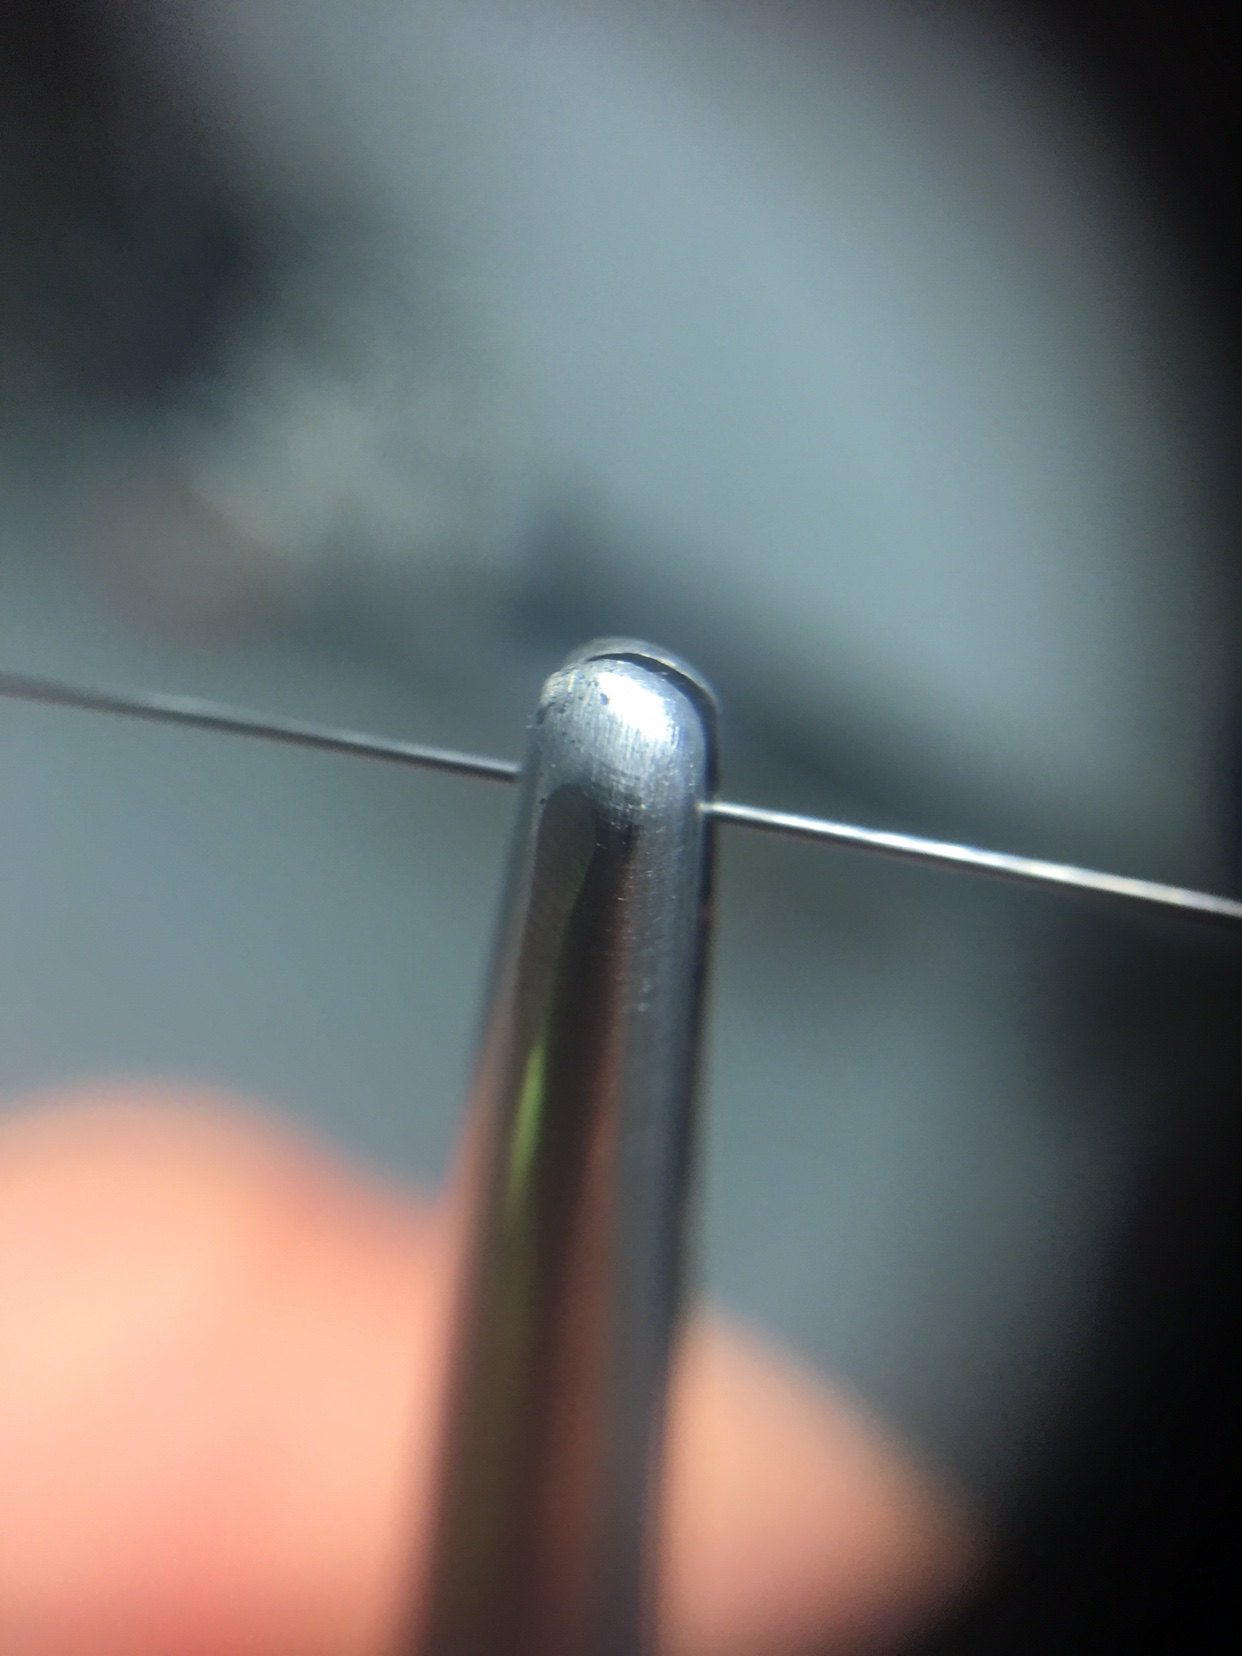
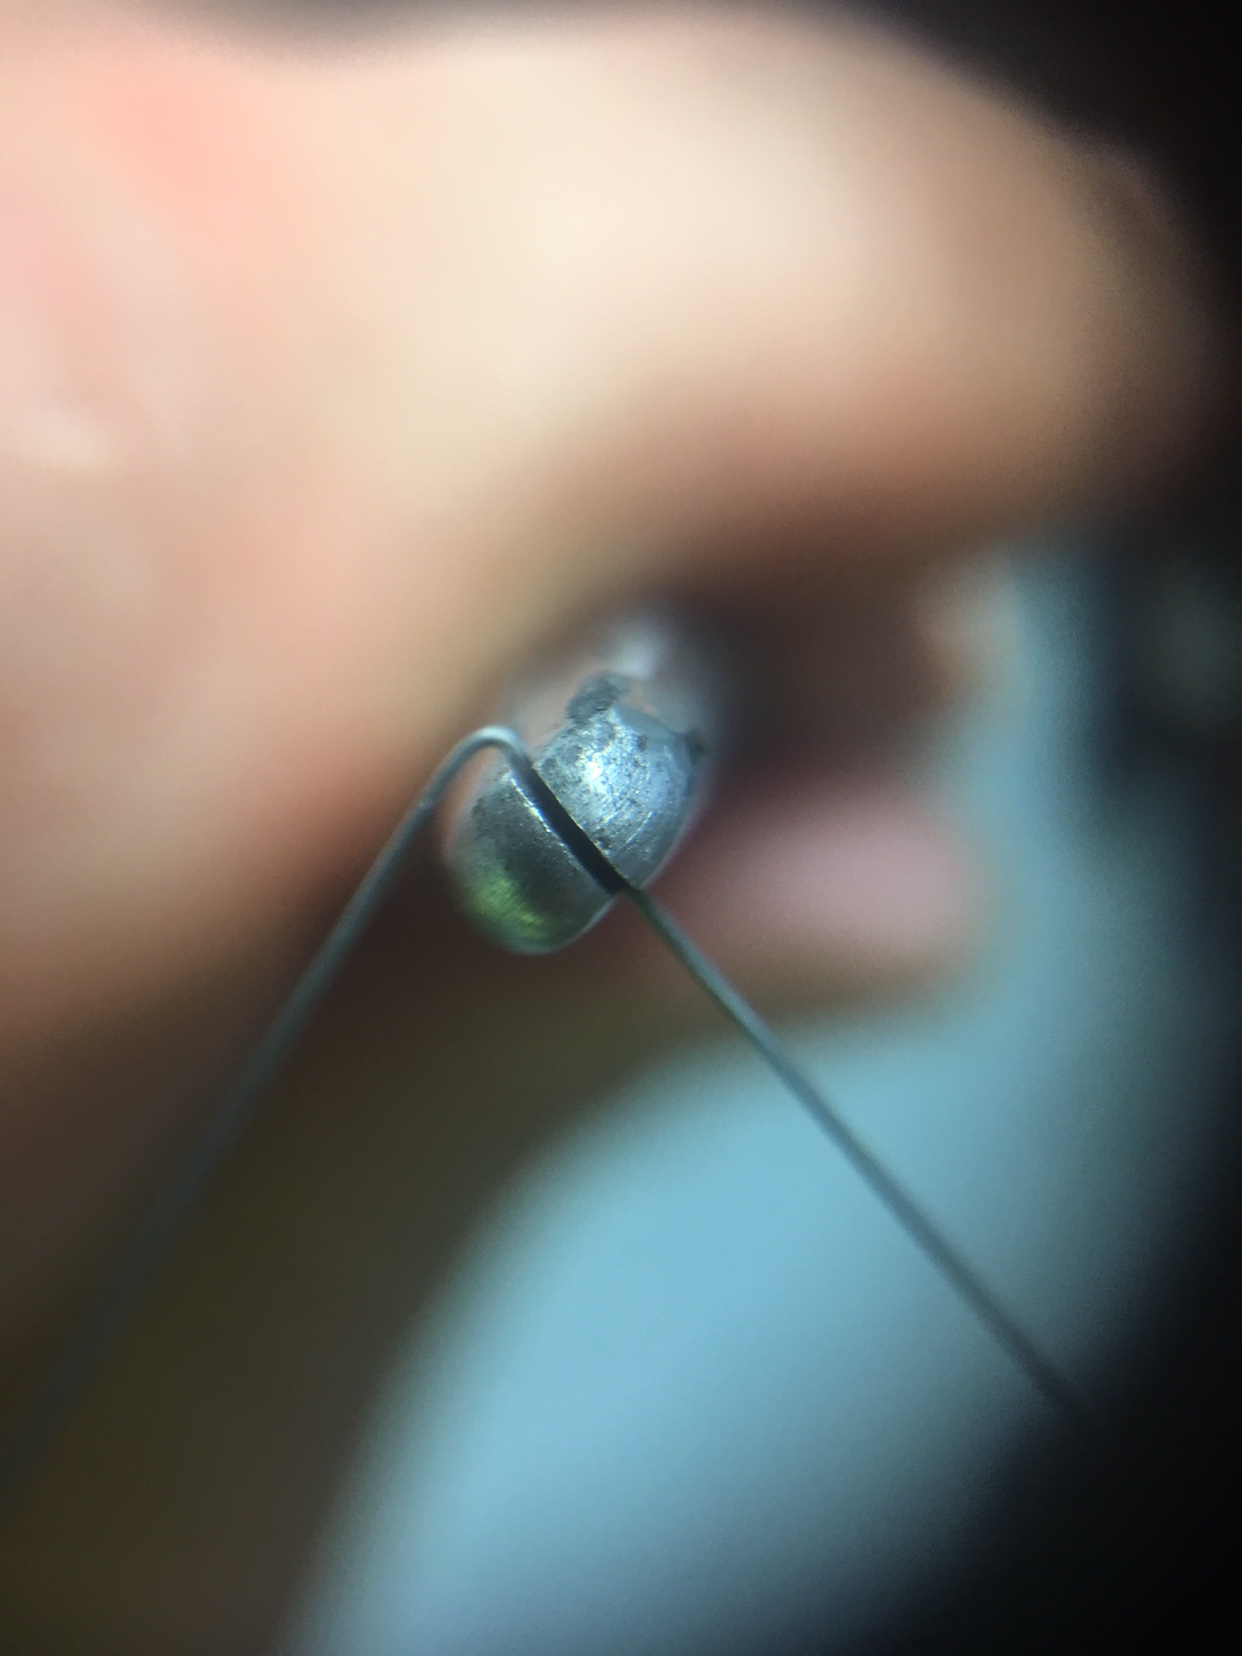
tip: stacking ribbon is fucking hard sometimes. its almost impossible to recover from a kink or any imperfection. good practice is to stretch each measure of it as you are taking it off the spool. what i do is grab the end of the wire with pliers and pull the length i need off the spool, then i grab the spool tight and pull the pliers until the wire gives a little tiny bit. usually thats enough to force it straight so i can cut it off the spool and lay it out of the way while i do the rest. if they are curling up on you at all, they will be very hard to work with.

tip: i cut off 2x the length of wire i need and fold it in half. that makes the folded end of the stack more solid and gives me a bit less to worry about when im in the first couple steps of making a stack for something.

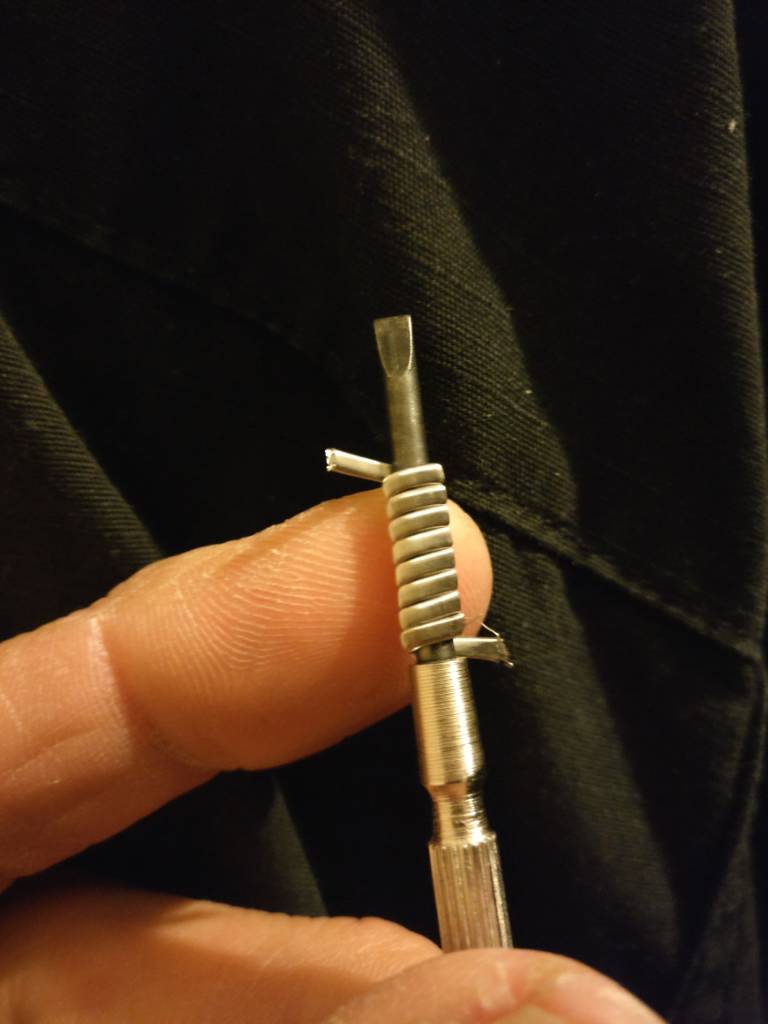
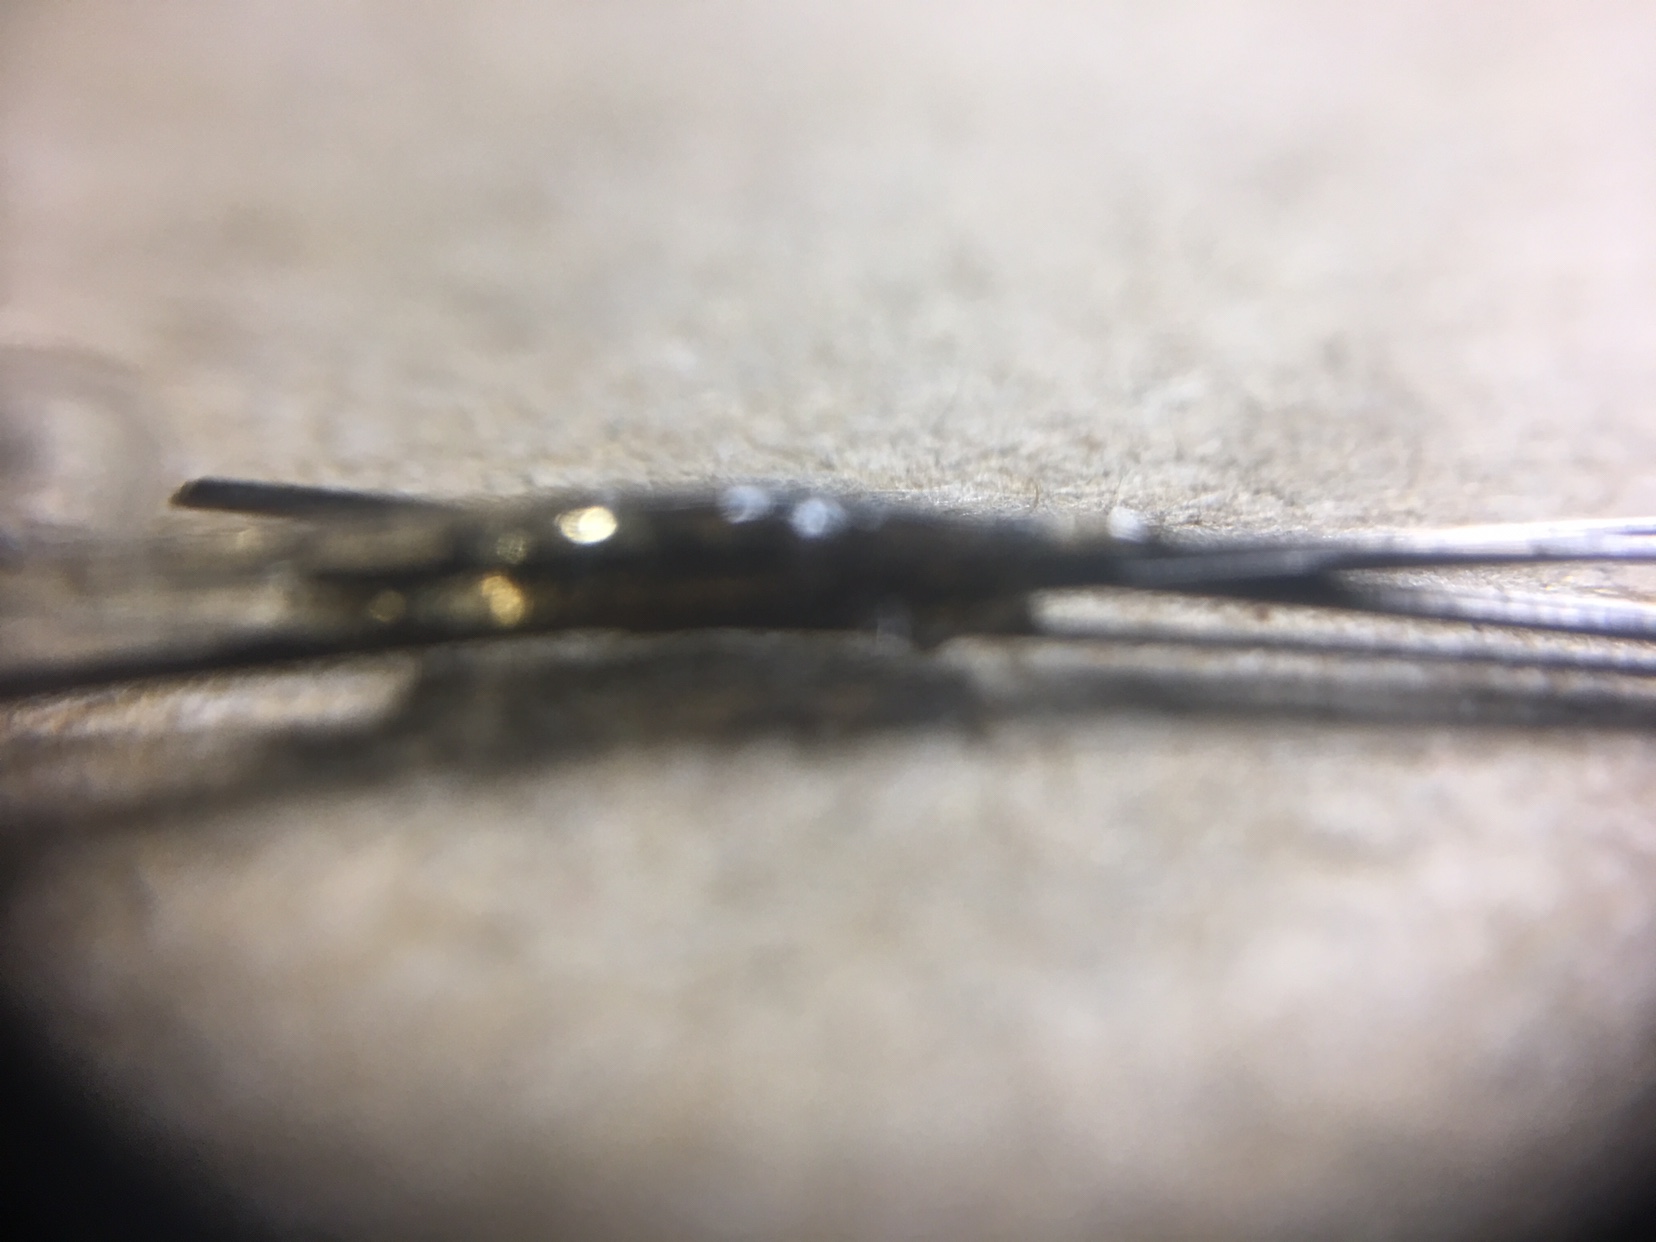
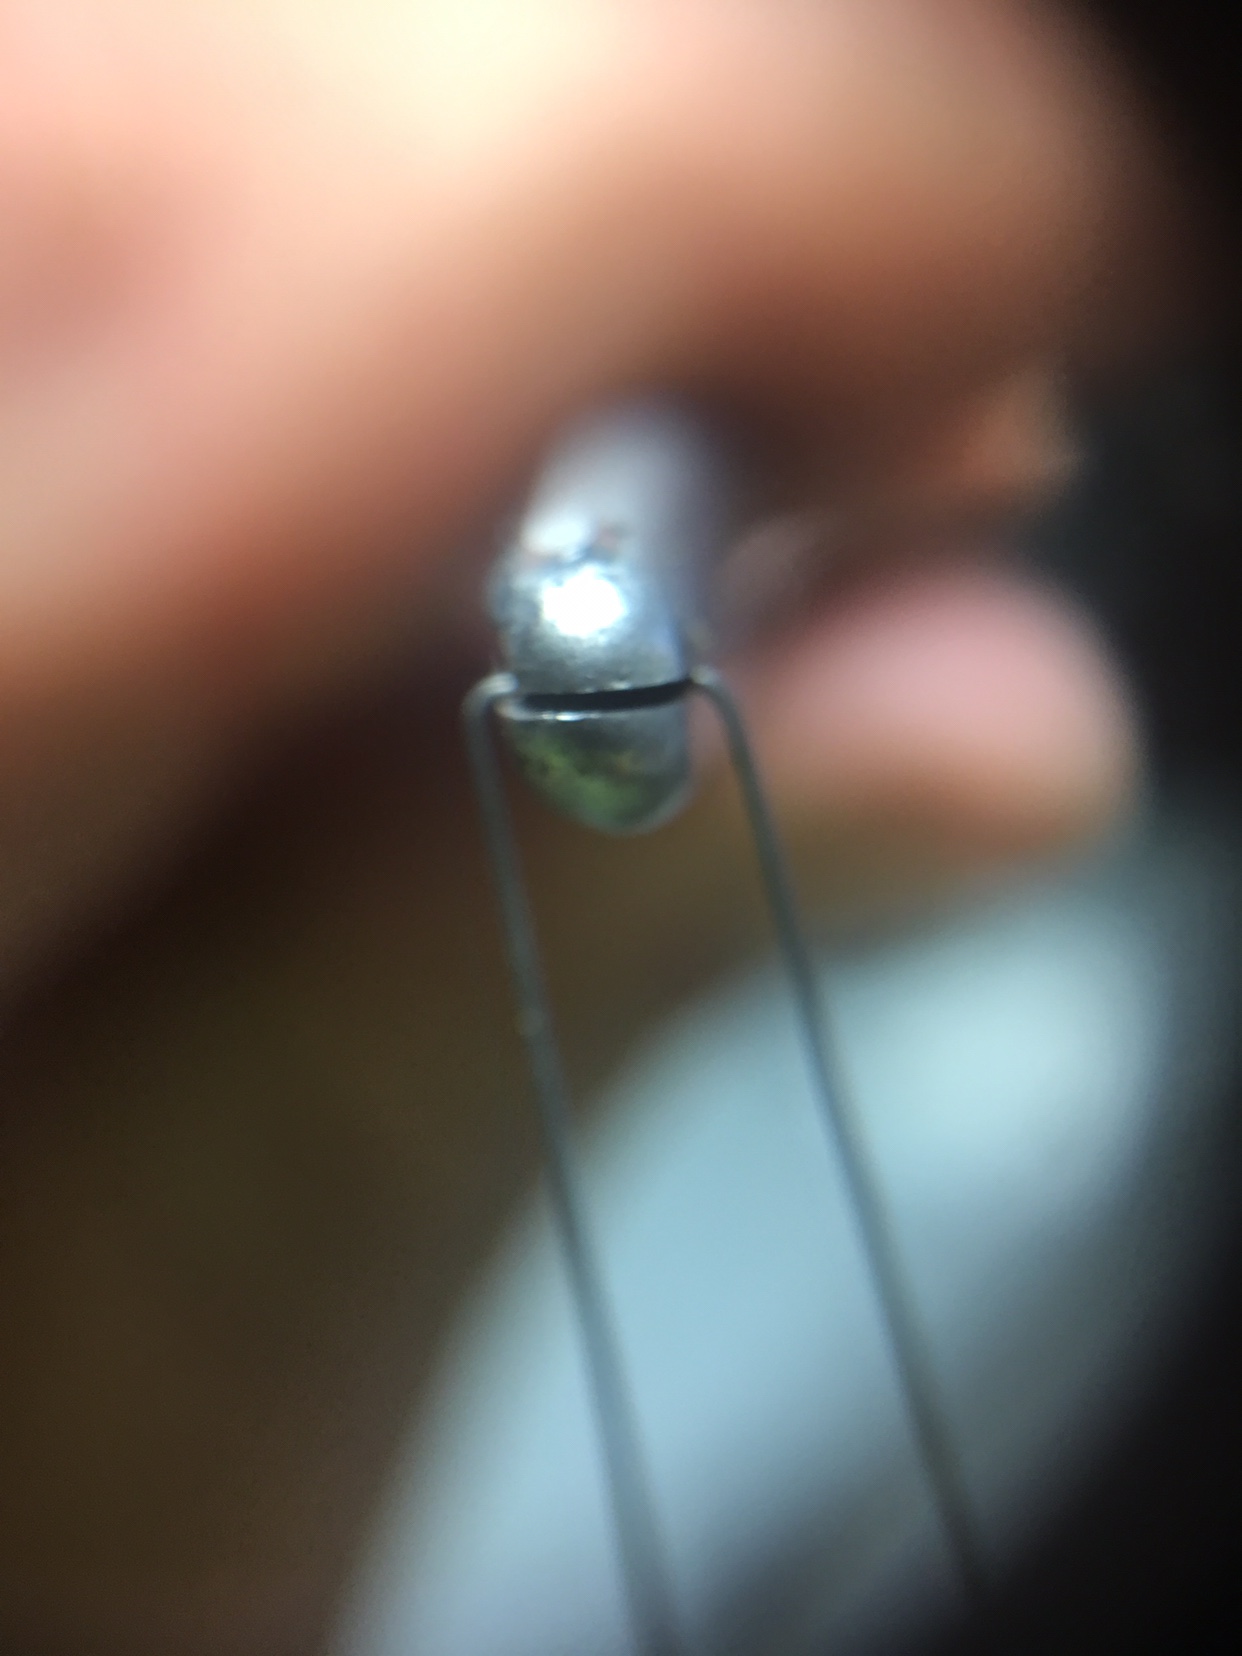
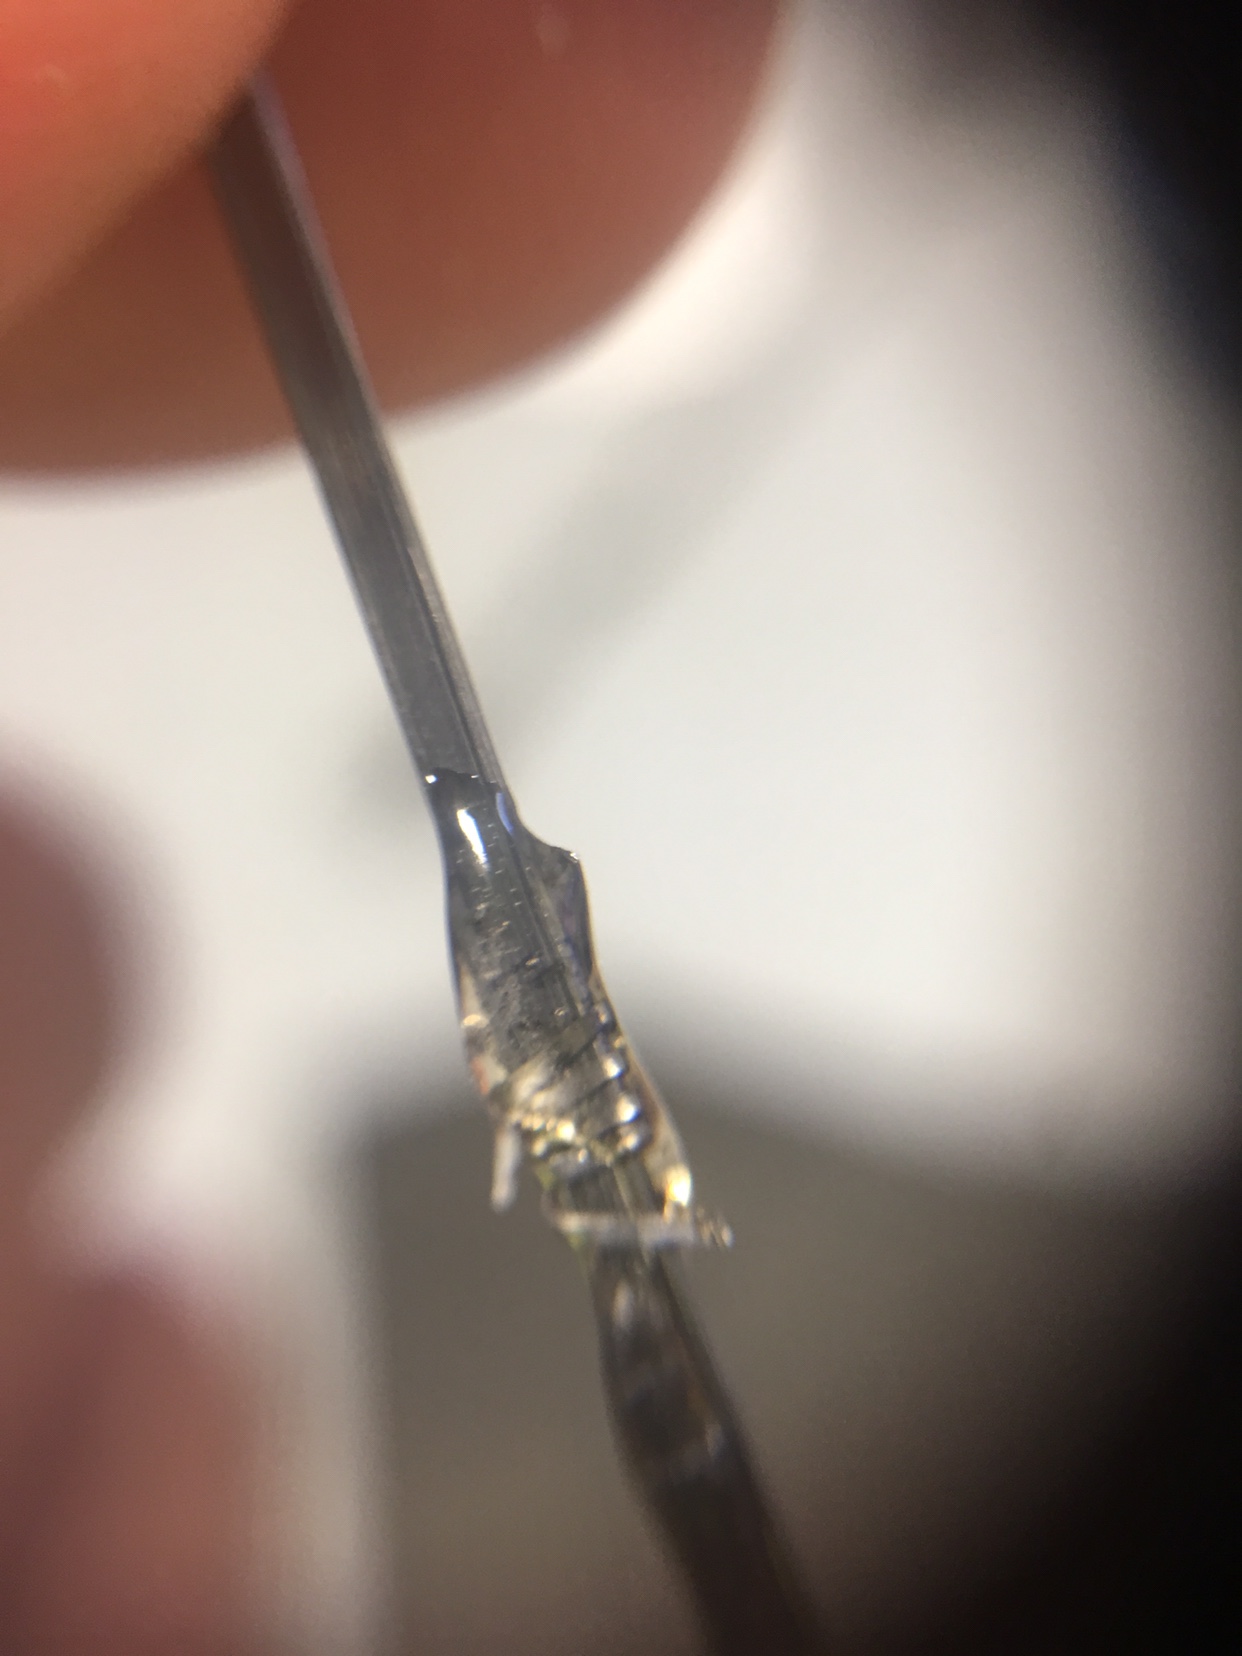
pic: framed staple in petri rda
staple.PNG

vid:heres a classic tutorial for the staple coil
 
Last edited:
Hi guys and gals

I keep having a lot of issues when framing ribbon, I make sure it is straight I secure it all together add my frames, secure them down but when I start to clapton it all together my frames are dropping from the side to the bottom no matter what I do. Any advice you can give would be massively appreciated
 

BKTOAD

Silver Contributor
Member For 4 Years
Have you tried a ribbon slider?

Just wrap a piece of ribbon wire around your frames and ribbon bundle and crimp tight, preferably with nylon pliers. 5 or so wraps. Start wrapping with the slider an inch or 2 from the drill. Wrap to the slider, then move it down an inch or 2 and repeat.
 
Have you tried a ribbon slider?

Just wrap a piece of ribbon wire around your frames and ribbon bundle and crimp tight, preferably with nylon pliers. 5 or so wraps. Start wrapping with the slider an inch or 2 from the drill. Wrap to the slider, then move it down an inch or 2 and repeat.
Yes I have tried this I put a tight piece at both ends and a slider on but doesn't seem to help
 

BKTOAD

Silver Contributor
Member For 4 Years
Yes I have tried this I put a tight piece at both ends and a slider on but doesn't seem to help

"Tight piece" of what at both ends?

The slider, when put on properly, is 100% foolproof. It is the training wheels on a bike.

Only thing I can suggest is keep the slider no more than 1" ahead of you and wrap 1" at a time (the width of your thumb) Also it is likely you are holding too much tension on the wrap wire and/or your cores are not setup properly. Prep work makes or breaks complex builds.

On builds i absolutely do not want to mess around with, i will put on 3 ribbon sliders. I install all of them near the very end of what will be your drill side. Leave the closest 2 to the drill right where they are and slide the swivel-side one down to the swivels. Helps line up the cores from the start. Then only move the middle one bit by bit as you wrap.

Edit: Depending on how exactly you set up your frames and ribbon, I would likely do my 3 ribbon sliders opposite what I suggested. Start at the swivel end, leave one at the swivel end, pull the other 2 to the drill end, then chuck my 2 frames into the drill
A tight slider at both ends
And okay I will just have to keep practicing I feel like I have had my slider too far away as I generally have it 4-5inch away from drill. Thank you for the help
 

BKTOAD

Silver Contributor
Member For 4 Years
I hope this helps.

I prepped this 2x28, 8x.3/36 framed staple with pics. But I am no awesome photographer nor do I have awesome equipment. Some things i assume you know how to do so i did not include pics. If anything is not clear, ask.

This is how I do it. More than 1 way to skin a cat. Not the quickest method. But, for me, foolproof.

I started by straightening and stretching my ribbon. I cut 4 lengths 20" each. I then held both ends of each wire, one at a time, with a pair of pliers and in my other hand I had a small screwdriver that I put through the loop and stretched the wire straight, creating a loop.

I then laid the 4 loops over eachother and gently slid my fingers down the ribbons until they were more or less in line. I then clipped off the portion of the ribbon wires that were kinked in the straightening process.

The rest of the ribbon stacking involves a decent amount of saliva.

I hold by the loop end and let the ribbon stack run between the inside of my lips to wet and straighten it, and run it between my fingers a few times, and I ended up with a loop that looks like this.
1d231e4d695980fcd2efe2d93f65ce76.jpg


Then I wire-bound the loop tight with 40g wire, like this
df912c55d5716533a3d5ac1677d0f1f4.jpg


Then repeat the saliva, lips, finger process until the ribbons match up nearly perfectly. And hold them by the cut end. Hit the cut end with a dab of hot glue. It will not be perfect yet.
dd01350eb4878b76319d95da60cf8922.jpg


Then more saliva, hit the hot glue with a lighter to soften, and quickly work down the wire with your fingers to better line up the cores before the glue re-hardens.
8ac21e71e3d5bd445bb52710eaabee68.jpg


Ribbon stack done.

For the frames, i chuck one end of a 24" piece of wire and hold the other end with pliers, stretch it tight and spin the drill a second or 2 to straighten.

Then I put the midpoint in my forceps (needlenose are ok too) and bend it around the forceps like so
40c59c32e087193ed7761027f8f1c827.jpg
c635546e22d37c00e1ca926589c59649.jpg
4acf8603494cb68676c9cfe88d61ec83.jpg


Then line up your ribbon and your frame like so
094e59b868de07c26b57d9aaa7001a4b.jpg
. Gently work the frame together by pinching it a little closer to the ribbon like so
0c0a9a18bfe7a41c54a1a48ad7a003ac.jpg

And wire bind like so
faa729226567f8cd03dc49e7147ee745.jpg

Little more hot glue on the wire bind, and on to the ribbon sliders.

Wrap around your cores
3a074b44de435592c9a8338118814497.jpg


And crimp tight
a9fe6dbe09b861e4a673e9c5c8b55749.jpg


Wrap the next one between the hot glue and your first slider and crimp
8028658768dcb1981750b7a9560565be.jpg


Wrap the third one between the first and second slider and crimp
a90fe34e00cb023ffdb64097103f52da.jpg


Run the bottom slider to the end of your stack and frames
ca1670cb77e16af686a5c3c0c73006a5.jpg


And hot glue it in place
02b5d19f3683970142edc6600743b308.jpg


Put the loop end in your swivel
87478c0158a9bf2ecd46faec2badb91b.jpg


And bend the ends of your frames 90 degrees at about 60 degree angles to eachother (just like for a fused clapton) and chuck them. Start with the ribbon slider an inch ahead of you and wrap it.
Thank you so much pictures helped a lot. Think I may have to invest in a hot glue gun now hahaha
 

Klayton86

Member For 2 Years
Member For 1 Year
Great job on description w/ pics, Really breaking it down so it's easy, many of your techniques/tricks are similar to my own . . My framed staples always come out clean and nice, even when I first started doing them the only trouble i had was actually wrapping around coiling jig
 

Klayton86

Member For 2 Years
Member For 1 Year
Kidney Puncher is the only place I ever get ribbon, one of the fellas on my building team keeps getting on me to get cheaper from Lightning vapes or somewhere, but if something ain't broke, I dont like to fix it
 

Klayton86

Member For 2 Years
Member For 1 Year
Congrats, man, i know i didnt get into the fray here until late in the game, but I would've if I'd been here earlier or seen your post!
Glad you got em goin, they're a darned good vape, in fact they are one of the only coil builds to rival the vape on my SSFC, but enjoy man, feel like I'm rambling, welcome to The Building Rabbit Hole.....
 

Klayton86

Member For 2 Years
Member For 1 Year
Congrats man! Glad you had success (I know man, I wish I could upload pics here, I have a BUNCH of sick builds on my gallery)
My Instagram has a few of my better builds on it tho
 

mach1ne

Gold Contributor
Member For 4 Years
I hope this helps.

I prepped this 2x28, 8x.3/36 framed staple with pics. But I am no awesome photographer nor do I have awesome equipment. Some things i assume you know how to do so i did not include pics. If anything is not clear, ask.

This is how I do it. More than 1 way to skin a cat. Not the quickest method. But, for me, foolproof.

I started by straightening and stretching my ribbon. I cut 4 lengths 20" each. I then held both ends of each wire, one at a time, with a pair of pliers and in my other hand I had a small screwdriver that I put through the loop and stretched the wire straight, creating a loop.

I then laid the 4 loops over eachother and gently slid my fingers down the ribbons until they were more or less in line. I then clipped off the portion of the ribbon wires that were kinked in the straightening process.

The rest of the ribbon stacking involves a decent amount of saliva.

I hold by the loop end and let the ribbon stack run between the inside of my lips to wet and straighten it, and run it between my fingers a few times, and I ended up with a loop that looks like this.
1d231e4d695980fcd2efe2d93f65ce76.jpg


Then I wire-bound the loop tight with 40g wire, like this
df912c55d5716533a3d5ac1677d0f1f4.jpg


Then repeat the saliva, lips, finger process until the ribbons match up nearly perfectly. And hold them by the cut end. Hit the cut end with a dab of hot glue. It will not be perfect yet.
dd01350eb4878b76319d95da60cf8922.jpg


Then more saliva, hit the hot glue with a lighter to soften, and quickly work down the wire with your fingers to better line up the cores before the glue re-hardens.
8ac21e71e3d5bd445bb52710eaabee68.jpg


Ribbon stack done.

For the frames, i chuck one end of a 24" piece of wire and hold the other end with pliers, stretch it tight and spin the drill a second or 2 to straighten.

Then I put the midpoint in my forceps (needlenose are ok too) and bend it around the forceps like so
40c59c32e087193ed7761027f8f1c827.jpg
c635546e22d37c00e1ca926589c59649.jpg
4acf8603494cb68676c9cfe88d61ec83.jpg


Then line up your ribbon and your frame like so
094e59b868de07c26b57d9aaa7001a4b.jpg
. Gently work the frame together by pinching it a little closer to the ribbon like so
0c0a9a18bfe7a41c54a1a48ad7a003ac.jpg

And wire bind like so
faa729226567f8cd03dc49e7147ee745.jpg

Little more hot glue on the wire bind, and on to the ribbon sliders.

Wrap around your cores
3a074b44de435592c9a8338118814497.jpg


And crimp tight
a9fe6dbe09b861e4a673e9c5c8b55749.jpg


Wrap the next one between the hot glue and your first slider and crimp
8028658768dcb1981750b7a9560565be.jpg


Wrap the third one between the first and second slider and crimp
a90fe34e00cb023ffdb64097103f52da.jpg


Run the bottom slider to the end of your stack and frames
ca1670cb77e16af686a5c3c0c73006a5.jpg


And hot glue it in place
02b5d19f3683970142edc6600743b308.jpg


Put the loop end in your swivel
87478c0158a9bf2ecd46faec2badb91b.jpg


And bend the ends of your frames 90 degrees at about 60 degree angles to eachother (just like for a fused clapton) and chuck them. Start with the ribbon slider an inch ahead of you and wrap it.
great post man :cheers:
 

KingPin!

In my defence, I was left unsupervised ^^
VU Donator
Platinum Contributor
Member For 4 Years
VU Challenge Team
Reviewer
I hope this helps.

I prepped this 2x28, 8x.3/36 framed staple with pics. But I am no awesome photographer nor do I have awesome equipment. Some things i assume you know how to do so i did not include pics. If anything is not clear, ask.

This is how I do it. More than 1 way to skin a cat. Not the quickest method. But, for me, foolproof.

I started by straightening and stretching my ribbon. I cut 4 lengths 20" each. I then held both ends of each wire, one at a time, with a pair of pliers and in my other hand I had a small screwdriver that I put through the loop and stretched the wire straight, creating a loop.

I then laid the 4 loops over eachother and gently slid my fingers down the ribbons until they were more or less in line. I then clipped off the portion of the ribbon wires that were kinked in the straightening process.

The rest of the ribbon stacking involves a decent amount of saliva.

I hold by the loop end and let the ribbon stack run between the inside of my lips to wet and straighten it, and run it between my fingers a few times, and I ended up with a loop that looks like this.
1d231e4d695980fcd2efe2d93f65ce76.jpg


Then I wire-bound the loop tight with 40g wire, like this
df912c55d5716533a3d5ac1677d0f1f4.jpg


Then repeat the saliva, lips, finger process until the ribbons match up nearly perfectly. And hold them by the cut end. Hit the cut end with a dab of hot glue. It will not be perfect yet.
dd01350eb4878b76319d95da60cf8922.jpg


Then more saliva, hit the hot glue with a lighter to soften, and quickly work down the wire with your fingers to better line up the cores before the glue re-hardens.
8ac21e71e3d5bd445bb52710eaabee68.jpg


Ribbon stack done.

For the frames, i chuck one end of a 24" piece of wire and hold the other end with pliers, stretch it tight and spin the drill a second or 2 to straighten.

Then I put the midpoint in my forceps (needlenose are ok too) and bend it around the forceps like so
40c59c32e087193ed7761027f8f1c827.jpg
c635546e22d37c00e1ca926589c59649.jpg
4acf8603494cb68676c9cfe88d61ec83.jpg


Then line up your ribbon and your frame like so
094e59b868de07c26b57d9aaa7001a4b.jpg
. Gently work the frame together by pinching it a little closer to the ribbon like so
0c0a9a18bfe7a41c54a1a48ad7a003ac.jpg

And wire bind like so
faa729226567f8cd03dc49e7147ee745.jpg

Little more hot glue on the wire bind, and on to the ribbon sliders.

Wrap around your cores
3a074b44de435592c9a8338118814497.jpg


And crimp tight
a9fe6dbe09b861e4a673e9c5c8b55749.jpg


Wrap the next one between the hot glue and your first slider and crimp
8028658768dcb1981750b7a9560565be.jpg


Wrap the third one between the first and second slider and crimp
a90fe34e00cb023ffdb64097103f52da.jpg


Run the bottom slider to the end of your stack and frames
ca1670cb77e16af686a5c3c0c73006a5.jpg


And hot glue it in place
02b5d19f3683970142edc6600743b308.jpg


Put the loop end in your swivel
87478c0158a9bf2ecd46faec2badb91b.jpg


And bend the ends of your frames 90 degrees at about 60 degree angles to eachother (just like for a fused clapton) and chuck them. Start with the ribbon slider an inch ahead of you and wrap it.

BK that was an exceptional guide!
 
Last edited:

mach1ne

Gold Contributor
Member For 4 Years
Damn sorry matey! Yes deffo add there as well BK

edited my comment machine lol ;)
no worries man :cheers: i have been meaning to come back and put some effort into the whole series. the alien one took off on its own, but the staples post didnt get any love yet. it would be awesome if @BKTOAD copied his post from here into it (or anyone else with tips..hint hint @KingPin! :p).
 

KingPin!

In my defence, I was left unsupervised ^^
VU Donator
Platinum Contributor
Member For 4 Years
VU Challenge Team
Reviewer
no worries man :cheers: i have been meaning to come back and put some effort into the whole series. the alien one took off on its own, but the staples post didnt get any love yet. it would be awesome if @BKTOAD copied his post from here into it (or anyone else with tips..hint hint @KingPin! :p).

LoL yeah I will gonna be tough to top BKs guide lol to be fair that's exactly how I do it as well except I'd extend it to say leave the frames longer than the ribbon at the opposite end so you can attach those to the drill
 

BKTOAD

Silver Contributor
Member For 4 Years
official staple coil thread <--add it here if you want

I am not sure how to copy and paste the content to another thread other than just adding a link.

I just use tapatalk.

Could u either let me know how or just move it to the staple thread for me? Really dont even care if my name is on it in the staple thread if that makes it easier.
 

KingPin!

In my defence, I was left unsupervised ^^
VU Donator
Platinum Contributor
Member For 4 Years
VU Challenge Team
Reviewer
I am not sure how to copy and paste the content to another thread other than just adding a link.

I just use tapatalk.

Could u either let me know how or just move it to the staple thread for me? Really dont even care if my name is on it in the staple thread if that makes it easier.

Unfortunately I don't think I can mate I can merge this thread but don't want to do that for the OP you could paste a link to your post in there though or upload pics again but they are embed here :(
 

KingPin!

In my defence, I was left unsupervised ^^
VU Donator
Platinum Contributor
Member For 4 Years
VU Challenge Team
Reviewer
I don't know how to merge threads but go ahead if you know how.

If I merge these @YouShouldVape you will lose this post and that other thread machine posted will becomes the master including him becoming the original poster of the thread.....are you sure you are ok with it because I cannot undo it :)
 

CrazyChef v2.0

Gold Contributor
ECF Refugee
VU Challenge Team
Member For 5 Years
Reddit Exile
VU Patreon
I was gonna put this in the "Post Your Builds" thread, but saw this one and thought it was more apt to put it here. On a bit of a framed staple mini marathon today... I just use 38g round wire, as opposed to the ribbon sliders that most people prefer.
2017-09-23 19.02.38.jpg
2017-09-23 19.04.40.jpg fstaples.jpg
 

mach1ne

Gold Contributor
Member For 4 Years
holy shit chef, thats a lot of framed staples. how long does it take you to prep one of those sticks to the point where they are in the pics?
 

CrazyChef v2.0

Gold Contributor
ECF Refugee
VU Challenge Team
Member For 5 Years
Reddit Exile
VU Patreon
Yes, but I've done a LOT of these - so it's only natural that I eventually get faster at it.
 

Dustyjeans

Bronze Contributor
Member For 4 Years

CrazyChef v2.0

Gold Contributor
ECF Refugee
VU Challenge Team
Member For 5 Years
Reddit Exile
VU Patreon
Damn chef you use ALOT of sliders! But hey whatever works rite?

Sent from my SM-N950U using Tapatalk
3, actually. 2 others for holding the wires together.

#1 slides all the way down to ensure the wires are all parallel and gets inserted in the drill chuck.
#5 holds the ribbon and frames
#2 is a stabilizer and slides along as I apply the binding
#3 is a redundant stabilizer for #2 and is probably useless, but I figure it can't hurt. It stays about 30mm behind #2.
#4 is an alternate stabilizer in case the wires bunch up on me somewhere along the way and I need to restart from the opposite side (rather than having to start all over again). It always stays where it is unless needed. I rarely need this, but it's nice to have the option.


OSuHKtV.jpg
 

Dustyjeans

Bronze Contributor
Member For 4 Years
3, actually. 2 others for holding the wires together.

#1 slides all the way down to ensure the wires are all parallel and gets inserted in the drill chuck.
#5 holds the ribbon and frames
#2 is a stabilizer and slides along as I apply the binding
#3 is a redundant stabilizer for #2 and is probably useless, but I figure it can't hurt. It stays about 30mm behind #2.
#4 is an alternate stabilizer in case the wires bunch up on me somewhere along the way and I need to restart from the opposite side (rather than having to start all over again). It always stays where it is unless needed. I rarely need this, but it's nice to have the option.


OSuHKtV.jpg
I guess I do it a little differently but it's good for those learning to see different methods and find what works for them. These aren't different methods per say but details that vary builder to builder. I bind at each end w/40 and just use 1 ribbon slider. Once I get the 1st 1/2" started and everything is good to go I slide it to the middle. I set up the Chuck end like this with the Ls grabbed between the jaws of the chuck.So there's tension on the frames.
The swivel end is the same as yours. I just do 20-30 FS a month and only spin at around 1800rpm.
6ad1e571e877319185677dda67cfe900.jpg
9c83fa250e773e34e5be793b7acf8b7f.jpg


Sent from my SM-N950U using Tapatalk
 

strigamort

Bronze Contributor
Member For 2 Years
Member For 1 Year
BK you are my hero. I am the first to preach the value of excellent prep and I've really tried when setting up my pre-wrap cores. I needed some help in how to structure everything together and that's exactly what I got.

Obviously a very humble length of wire, but I'm only trying to get the concepts and technique down for the time being. The artistry will come later. I already have a really awesome wire crimping tool for corrugated sections. I tried using it right away and found that it only made something difficult nearly impossible (for me). So it's sat there doing nothing. At least I have some hope now that it will get put to work! :)

Thanks again to you, and to all of you fellows that give out great advice and instruction.

My first attempt at a corrugated anything didn't go well.

8304de453703418b45ce5920d2b2246d.jpg


The rest ain't pretty but it's perfectly functional. All I ask for at this point. Now)
db99f58a9d03a890b3f10788a123c52a.jpg
efee39225b5cdabd9a6158831a679f49.jpg
ff54489fb9125a8c885f6bbda76ac31a.jpg
26836c35241897817e843234aa414487.jpg
6469147c0401a2bf3f8370fb05cc9221.jpg
1bf3beffab08ef65f725a6840e6f428f.jpg


Sent from my ONEPLUS A3000 using Tapatalk
 

KingPin!

In my defence, I was left unsupervised ^^
VU Donator
Platinum Contributor
Member For 4 Years
VU Challenge Team
Reviewer
BK you are my hero. I am the first to preach the value of excellent prep and I've really tried when setting up my pre-wrap cores. I needed some help in how to structure everything together and that's exactly what I got.

Obviously a very humble length of wire, but I'm only trying to get the concepts and technique down for the time being. The artistry will come later. I already have a really awesome wire crimping tool for corrugated sections. I tried using it right away and found that it only made something difficult nearly impossible (for me). So it's sat there doing nothing. At least I have some hope now that it will get put to work! :)

Thanks again to you, and to all of you fellows that give out great advice and instruction.

My first attempt at a corrugated anything didn't go well.

8304de453703418b45ce5920d2b2246d.jpg


The rest ain't pretty but it's perfectly functional. All I ask for at this point. Now)
db99f58a9d03a890b3f10788a123c52a.jpg
efee39225b5cdabd9a6158831a679f49.jpg
ff54489fb9125a8c885f6bbda76ac31a.jpg
26836c35241897817e843234aa414487.jpg
6469147c0401a2bf3f8370fb05cc9221.jpg
1bf3beffab08ef65f725a6840e6f428f.jpg


Sent from my ONEPLUS A3000 using Tapatalk

Great work stig! Bet that coil kicks out some serious cloudage on the wasp haha
 

strigamort

Bronze Contributor
Member For 2 Years
Member For 1 Year
Thanks KPin! It does pretty well, although it would probably do even better with a bit more punch than the dna75c can swing with.

Sent from my ONEPLUS A3000 using Tapatalk
 

Zohmbiebuilds

Silver Contributor
Member For 3 Years
Hey strig

I don't have much experience with building Staples but there by far my favorite bought coil. My buddy at the vape shop would always let me get a few free. Imo the best staple I've had was the framed staple. This being said, I Vaped that kind of coil say 100 Watts minimum.

Love you dude. Stay in touch

Sent from my Z981 using Tapatalk
 

Markcyril

Member For 2 Years
Member For 1 Year
Quick questions from a new builder.

1. The ribbon should be bigger than the frame right? (eg 26g frames x .5 ribbon)
2. What type of ribbon do you all usually use and why?;
3. How about SS ribbons? Would they be too low to vape on?
4. How many ribbons should I use? Does it matter?
 

KingPin!

In my defence, I was left unsupervised ^^
VU Donator
Platinum Contributor
Member For 4 Years
VU Challenge Team
Reviewer
Quick questions from a new builder.

1. The ribbon should be bigger than the frame right? (eg 26g frames x .5 ribbon)
2. What type of ribbon do you all usually use and why?;
3. How about SS ribbons? Would they be too low to vape on?
4. How many ribbons should I use? Does it matter?

I’ve always gone with

30g for 0.3 ribbon
28g for 0.4 ribbon
26g for 0.5 ribbon

I tend to use kanthal ribbon to keep resistance up not other reason would be happy to use other metals as well probably N80 if I were to use something else as I prefer the taste over pure SS personally and it’s easier to work with

Yeah you can use SS ribbon remember the more stacks you add the less the resistance is though think of it like a hose pipe in this respect ...also SS has a lower resistivity over kanthal which is always against you especially if you want dual coils

I’d start with a four stack of 0.4 ribbon and go from there its the easiest to work with out of the list at least this is what I find

Plan your builds using the steam engine wire wizard or take a look through the post your builds threads most people state the resistance of thier builds when mounted ...then write down in your coil recipe book ;)

Hope it helps mate :)
 

VU Sponsors

Top