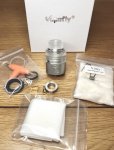
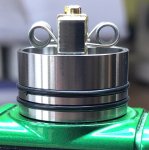
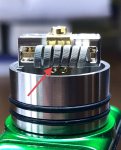
KingPin!
In my defence, I was left unsupervised ^^
VU Donator
Platinum Contributor
Member For 4 Years
VU Challenge Team
Reviewer
Hi Folks,
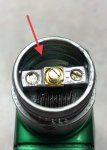
It’s going to be a mission to describe what’s going on with this RDA, but I’ll do my very best! Actually let’s give it a go now shall we ….how do you go about getting airflow to exit against both sides of the same coil, in particular dual coils with a central post clamp system?
Drill a hole through the centre of the post! By taking a shortcut you connect point A and B simultaneously.
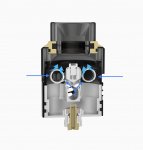
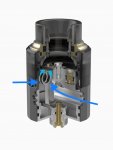
This is exactly what wormholes are about! well sort of ….there be math ‘n’ stuff, also descriptions like “transcendental bijection of the space-time continuum”
Physics eh, it’s difficult to deny it’s not filled with self-indulgence!…..but then the same could be said about reviewing…. Whoa there; hold your horses! …..well come on, they get to theorise and critique, reviewers get to critique and make stuff up …..Same difference …..Maybe I missed my calling!
I therefore theorise what lies beyond our known universe is......a snow globe ….That’s right folks! …I know I’m right by the way (Earthworm Jim taught me that in “The Secret of the Universe!”) But enough with the self-indulgence! I do need to start reviewing this bloody thing at some point ….so let’s get on with it shall we.
As always I don’t like to make recommendations in my reviews. Instead I’ll present you with my findings to help bolster your research should you be interested in the product.
My Measurements
Available Colours: Silver, Black, Gold
Product Info: http://www.vapefly.net/vapefly-wormhole-rda/
Build Quality & Impressions
Ever heard of the Thuglyfe RDA?. I tell you what these two RDA’s were released around the same time (Vapefly launched the Wormhole slightly after). I can’t see how they weren’t in development at the same time, yet they share so many similarities …spooky eh?
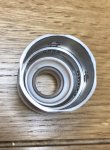
Sadly I haven’t got the Thuglyfe RDA to compare, I nearly snagged it, but one of the things I was concerned about, looking at the pics and talking to friends, was the metal top cap getting hot. Thankfully that’s something the Wormhole RDA keeps to a minimum with the PMMA design, “except” for the metal beauty ring/810 drip tip holder. It can be removed (I forgot to take it out in the pic below), however you’ll be chuffing on this tail pipe style because it’s holding the drip tip in place which is a real shame.
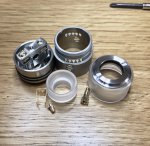
This leads me to focus on the drip tip itself. Personally its bore is a bit too wide for my liking, and it’s a little short at just 7mm because that metal ring gets hot with the coils being close to the top.
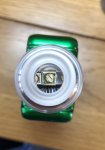
Running a 510 drip tip is a perfectly viable option, in fact I’d go as far as saying you can get some serious flavour doing so!

This is the part of the review I really need to start talking about the airflow because it plays a massive role as to how you vape it…..ok here we go, please bear with me.
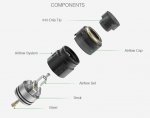
The components I’ll be talking about are:
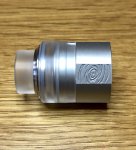
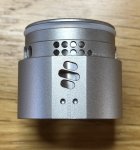
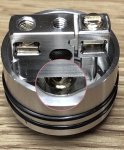
The Airflow Cap (Top Cap to me) – twisting this top cap controls the side airflow onto the coil. Depending on whether you are in a single or dual coil configuration (using the housing piece below) gets you access to either the 9 small holes for single coil, or two sets of 5 larger holes for dual coil (see my measurements further up). At first sight you think to yourself; “why is it I can only access some of the holes at any one time?” …..Take it from me; this is an airy tank with everything wide open, so you won’t need all of them. More importantly, and this is the genius part of it…As you adjust the housing underneath these airflow holes naturally move away from centre of the coil …so no matter which direction you adjust the section below you can keep the side airflow centre on the coil by adjusting the top cap…love attention to detail like this, top marks…Vapefly!


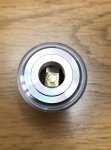
Airflow System (Housing) – Twisting this section moves the side airflow holes as described above, however its main function is twofold: Firstly it controls the amount of airflow through the centre of the post, secondly it rotates to allow you the select between single and dual coil configuration. Again at first you think to yourself “why have I got two airflow cut outs for single coil and only one for dual coil, especially as the airflow only travels through the post from one side?”…..they have thought about this as well: it’s so it doesn’t matter which side of the deck you plonk the single coil.
Airflow Set (C Clamp)
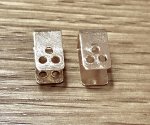
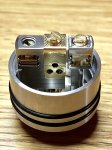
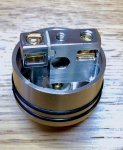
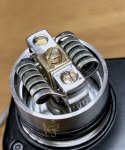
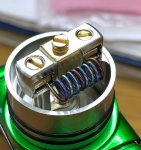
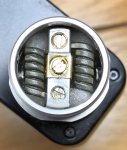
This is the last piece in the jigsaw puzzle…you can either completely remove it leaving just the screw in place (although doing so exposes you to easier leaking), Put on the dual coil clamp, or just the single coil clamp. This airflow section is set at an upward angle of 45”ish” degrees. I’ll be positioning my coils on this RDA as if the airflow is going through the coil diagonally.
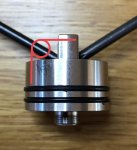
While “through post airflow” isn’t a new concept, the way Vapefly have executed this lot is pretty good, you can tell they have put some thought into it. They could have just taken the easy route by stamp pressing a deck into an already existing base (like some out there do) but nope we got some fresh ideas going on here….in fact, so far between the Vapefly Horus and Galaxies I’ve reviewed recently they applied this same attention to airflow detail in all three of their products. I’m also happy how their QC is improving as we move along …they are definitely on the right path at the moment in my book, keep it up!
It’s going to be a mission to describe what’s going on with this RDA, but I’ll do my very best! Actually let’s give it a go now shall we ….how do you go about getting airflow to exit against both sides of the same coil, in particular dual coils with a central post clamp system?
Drill a hole through the centre of the post! By taking a shortcut you connect point A and B simultaneously.


This is exactly what wormholes are about! well sort of ….there be math ‘n’ stuff, also descriptions like “transcendental bijection of the space-time continuum”
Physics eh, it’s difficult to deny it’s not filled with self-indulgence!…..but then the same could be said about reviewing…. Whoa there; hold your horses! …..well come on, they get to theorise and critique, reviewers get to critique and make stuff up …..Same difference …..Maybe I missed my calling!
I therefore theorise what lies beyond our known universe is......a snow globe ….That’s right folks! …I know I’m right by the way (Earthworm Jim taught me that in “The Secret of the Universe!”) But enough with the self-indulgence! I do need to start reviewing this bloody thing at some point ….so let’s get on with it shall we.
As always I don’t like to make recommendations in my reviews. Instead I’ll present you with my findings to help bolster your research should you be interested in the product.
My Measurements
- Height: 35.8mm
- Diameter: 24.2mm
- Drip Tip: Height: 12mm (visible 7mm), Diameter: 17mm, Bore: Tapered 14mm down to 10mm
- Thread Length: 4.7mm
- Juice well Depth: 11.3mm (usable 4mm)
- Deck inside Diameter: 19.7mm
- Top Chamber Dimensions: 16.4mm x 3.5mm
- Post Build Space: 12.5mm
- Top Airflow: Nine 1.2mm holes for single coil, Two lots of 1.8 x 2.8mm holes for dual coil
- Lower Airflow: Three for single coil or Six for dual coil inlets (top and bottom 1.8 x 2.8mm and centre 1.8 x 4.5mm)
- Materials used: SS304, PMMA (drip tip and top cap), Gold Plating
Available Colours: Silver, Black, Gold
Product Info: http://www.vapefly.net/vapefly-wormhole-rda/
Build Quality & Impressions
Ever heard of the Thuglyfe RDA?. I tell you what these two RDA’s were released around the same time (Vapefly launched the Wormhole slightly after). I can’t see how they weren’t in development at the same time, yet they share so many similarities …spooky eh?
Sadly I haven’t got the Thuglyfe RDA to compare, I nearly snagged it, but one of the things I was concerned about, looking at the pics and talking to friends, was the metal top cap getting hot. Thankfully that’s something the Wormhole RDA keeps to a minimum with the PMMA design, “except” for the metal beauty ring/810 drip tip holder. It can be removed (I forgot to take it out in the pic below), however you’ll be chuffing on this tail pipe style because it’s holding the drip tip in place which is a real shame.

This leads me to focus on the drip tip itself. Personally its bore is a bit too wide for my liking, and it’s a little short at just 7mm because that metal ring gets hot with the coils being close to the top.

Running a 510 drip tip is a perfectly viable option, in fact I’d go as far as saying you can get some serious flavour doing so!

This is the part of the review I really need to start talking about the airflow because it plays a massive role as to how you vape it…..ok here we go, please bear with me.

The components I’ll be talking about are:
The Airflow Cap (Top Cap to me) – twisting this top cap controls the side airflow onto the coil. Depending on whether you are in a single or dual coil configuration (using the housing piece below) gets you access to either the 9 small holes for single coil, or two sets of 5 larger holes for dual coil (see my measurements further up). At first sight you think to yourself; “why is it I can only access some of the holes at any one time?” …..Take it from me; this is an airy tank with everything wide open, so you won’t need all of them. More importantly, and this is the genius part of it…As you adjust the housing underneath these airflow holes naturally move away from centre of the coil …so no matter which direction you adjust the section below you can keep the side airflow centre on the coil by adjusting the top cap…love attention to detail like this, top marks…Vapefly!


Airflow System (Housing) – Twisting this section moves the side airflow holes as described above, however its main function is twofold: Firstly it controls the amount of airflow through the centre of the post, secondly it rotates to allow you the select between single and dual coil configuration. Again at first you think to yourself “why have I got two airflow cut outs for single coil and only one for dual coil, especially as the airflow only travels through the post from one side?”…..they have thought about this as well: it’s so it doesn’t matter which side of the deck you plonk the single coil.
Airflow Set (C Clamp)

This is the last piece in the jigsaw puzzle…you can either completely remove it leaving just the screw in place (although doing so exposes you to easier leaking), Put on the dual coil clamp, or just the single coil clamp. This airflow section is set at an upward angle of 45”ish” degrees. I’ll be positioning my coils on this RDA as if the airflow is going through the coil diagonally.

While “through post airflow” isn’t a new concept, the way Vapefly have executed this lot is pretty good, you can tell they have put some thought into it. They could have just taken the easy route by stamp pressing a deck into an already existing base (like some out there do) but nope we got some fresh ideas going on here….in fact, so far between the Vapefly Horus and Galaxies I’ve reviewed recently they applied this same attention to airflow detail in all three of their products. I’m also happy how their QC is improving as we move along …they are definitely on the right path at the moment in my book, keep it up!
Last edited:

